I Dyed My Hair Red For $1.25 Using Natural Henna, And Was Seriously Surprised At The Outcome
The natural red dye is potent and actually good for hair!


I have decided to experiment with using henna to dye my hair red!
Dying your hair red is a pain for a ton of reasons: It’s difficult to do at home, expensive to do at the salon, requires a ton of maintenance, and so on.
But there’s a natural alternative that, if the rumors are true, can achieve similar results without any damage for a fraction of the price. It’s called henna. Have you heard of it?
Henna is a natural reddish dye made from the plant of the same name. People have used it for thousands of years to dye their hair, skin, and fingernails, as well as fabrics like wool and leather.
In addition to producing a vibrant pigment, henna is also actually good for your hair, which sets it apart from hair dye.
It moisturizes, repairs, and even treats dandruff and other skin infections (seriously, there’s a WebMD page just for henna). Also, it’s cheap; boxes are available for around $2.50, and you can use that box at least twice.
In short, henna offers a ton of benefits that hair dye doesn’t. But as with most all-natural products, there’s a trade-off.
Henna comes in powder form, which you then mix with water to make into a paste. It’s messy, and it can be difficult to apply. Since it also dyes skin and fabrics, it easily creates stains. Also, it doesn’t offer the same level of color consistency that hair dye does.
Personally, I had a rough start with this impressive plant-based dye.
In high school, I tried to dye my hair with henna exactly one time. A friend of mine with short, straight, and light brown hair regularly used henna to turn her hair into gorgeous mahogany. I wanted to do the same. But unlike my friend, I’ve always had super-curly, long-ish, nearly black hair. The henna made a huge mess in my bathtub and didn’t have much of an effect.
Also, in high school, I got a lovely henna tattoo done on my hand. A few minutes later, I accidentally smeared the design while I was in the bathroom. Instead of a temporary tattoo, I just had a dirty-looking arm for a couple of weeks. Henna is a delicate and risky art, to say the least.
But that was a long time ago, and I recently decided to give henna another go. I’m happy to report that it turned out much, much better this time. Here’s how I used it!
Things You Should Know About Henna
Before we get into the tutorial, there are some things about henna that you should know.
First, henna comes in only one color. The powder is green, and it results in a reddish, orange-ish, brown-ish color. If you find henna in other colors, it means that other ingredients have been added to it.
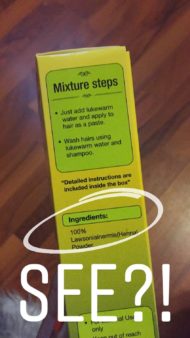
Second, on that note, not all henna is created equal. Many products are marketed as “henna” but actually contain other ingredients — sometimes they don’t contain any actual henna at all! That’s not necessarily a bad thing, but it does make it important to actually read the box and do your research before you put a product on your hair.
You should look for a henna that contains only plant ingredients — 100% pure henna is your safest bet, but other plant ingredients are also safe, like indigo, cassia, and amla. Definitely avoid henna that contains chemical additives, such as metallic salts, which can ruin your hair (no exaggeration). Many boxed store dyes contain these additives.
And last, henna is a permanent hair dye. It does fade over time, but it’s difficult to completely remove from the hair without going through A LOT.
With that said, it’s a great option for those who want to add all-natural color to their hair. Pure henna can be used on all hair types, including hair that has previously been dyed. The color is gorgeous, buildable, and easy to retouch.
Now that we’ve got all that covered, let’s get onto the dying!
1. Choose a Henna Product
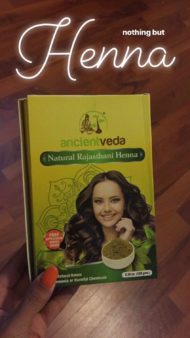
Henna is sold at practically every natural or health store these days. I first checked Whole Foods, but the henna there was about $18 — probably because it was full of a ton of other plant ingredients, all of which are perfectly good for your hair, but not at all necessary.
I just wanted pure henna. So I checked a local Indian store. Sure enough, it had a box of regular, plain henna powder for about $2.50.
(Alongside this box were a ton of other boxes of other types of henna, many of which contained the exact chemical additives that you should avoid.)
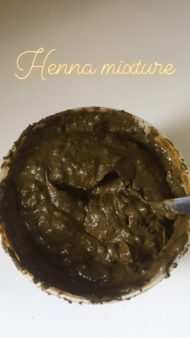
2. Prepare the Henna Mixture
Like all hair dyes, henna shows up differently on different shades of hair. If you have blond hair, it’ll show up as a vibrant red. If you, like me, have dark brown hair, the effect is more subtle — more of a rinse or highlight than pure color.
Either way, if you want to get the most bang for your buck, you need to prepare the mixture ahead of time — up to 12 hours before you plan to use it on your hair. This allows plenty of time for the dye to release.
To prepare your henna mixture, first pour the powder into a medium-sized bowl. I used about 2.25 oz. of powder for my bra-strap-length hair.
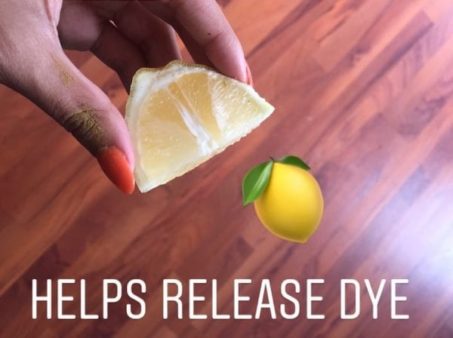
Slowly add water and/or lemon juice to the powder until it forms a smooth paste. Lemon juice helps to release the dye from the powder.
Then cover it, and let it sit for a few hours.
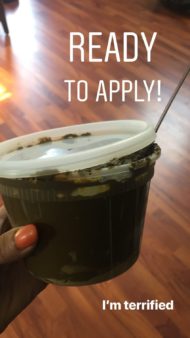
When you’re ready to apply the henna, add a bit more water if needed until it’s nice and smooth.
3. Apply the Henna

In researching how best to apply henna to my hair, I discovered plenty of horror stories about henna-covered bathrooms. To avoid the worst of it, I followed a few simple steps.
First, I made sure that my henna mixture was smooth, not crumbly, so it wouldn’t fling everywhere while I applied it.
Second, I grabbed some disposable gloves to protect my hands and nails.
Third, I got a couple plastic bags to cover my hair after applying the henna. You can also use plastic wrap, the clingy kind.
Finally, I removed the rugs from my bathroom to avoid staining them. Some people advise sitting in the bathtub to apply henna so as to contain the mess, but I needed to be able to look in the mirror while applying, so I did it over my sink.

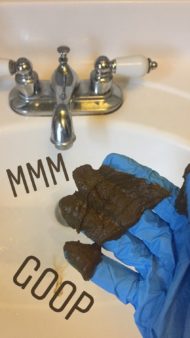
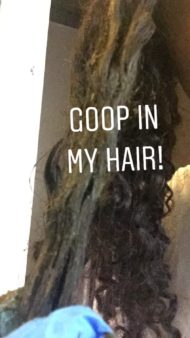
OK, application time! My henna came with an applicator brush, but I didn’t use it even once. I just grabbed globs of henna with my hands and applied it from root to tip.
I divided by hair into quarters and worked section by section to make it easier to keep track. Because henna is thick and not very slippery, it makes your hair harder to detangle, so it’s best to work with already detangled hair.
When each section was done, I twisted it into a bun (or a Bantu knot) to get it out of the way.

After I finished my entire head, I removed my gloves and tied the plastic bag onto my head. Then I put a satin bonnet on top, because walking around with a plastic bag on my head felt strange.
Now, time to wait.
4. Wait a Few Hours
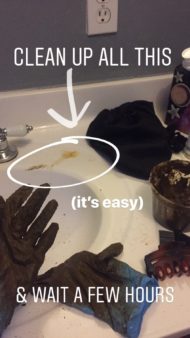
Next, you just pour a glass of wine and turn on the TV and relax while you wait. The longer you leave the henna on your hair, the brighter the color will be. Some folks leave it on overnight to get the brightest color possible. You should aim for at least two hours to make sure that the henna shows up.
I have dark hair, so I wanted to leave it on for a while, but there’s no way I was going to sleep with a plastic bag on my head. It was hard to even relax and watch TV with a plastic bag on my head. In the end, I lasted only three hours.
5. Rinse Thoroughly

Last step! I removed the plastic bag and rinsed the henna out of my hair — still wearing gloves, just in case.
Henna is thick and can be difficult to wash out completely. You’ll probably need to do a full shampoo and rinse.
The Results
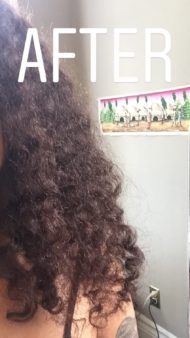
My hair isn’t styled in the “after” photos, mind you, but that has nothing to do with the henna, and everything to do with me being lazy.
After I rinsed the henna out, it was difficult to tell whether it had worked or not. It was already nighttime, and I couldn’t see much difference in my hair.
When I woke up, the towel I’d slept on was a bit reddish — something to keep in mind if you, too, have white pillows.
In the light of morning, I saw the actual results.

My hair had a red sheen to it, especially in the sun. It’s subtle, but definitely noticeable, which I like! I didn’t want drastic color, nor did I expect it on my dark brown hair. The henna gave me a subtle red glow.
My first two experiences with henna left much to be desired, but I’d call henna round three a smashing success. And since I used only half of a $2.50 box, it’s ridiculously affordable. The process was a little cumbersome, but it’ll be easy to maintain now. The color should last for a few months, and in the meantime, all I’ll have to do is touch up my roots.
Overall, I found henna to be a great natural dye. I recommend it!
SKM: below-content placeholderWhizzco for CRH