10 Gorgeous Floral DIYs To Brighten The House While Stuck Inside
Improve the home/work/school environment while passing the time with these creative projects!

Floral DIYs are always a good idea, in my opinion, but these decor ideas are especially appropriate during this time we’re all told to stay home – and right when spring is coming into full bloom, of course! Bring some of that bright, beautiful, spring color and vibe into your house with these easy DIYs. Not only will you be improving your living/working/schooling space, but you’ll pass the time working on these creative projects. Win-win!
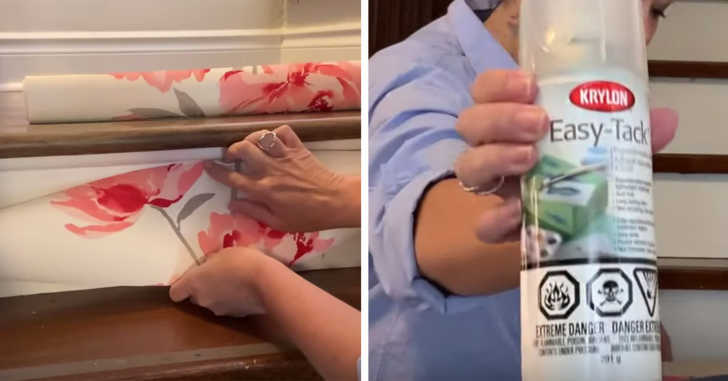
Floral Stairs
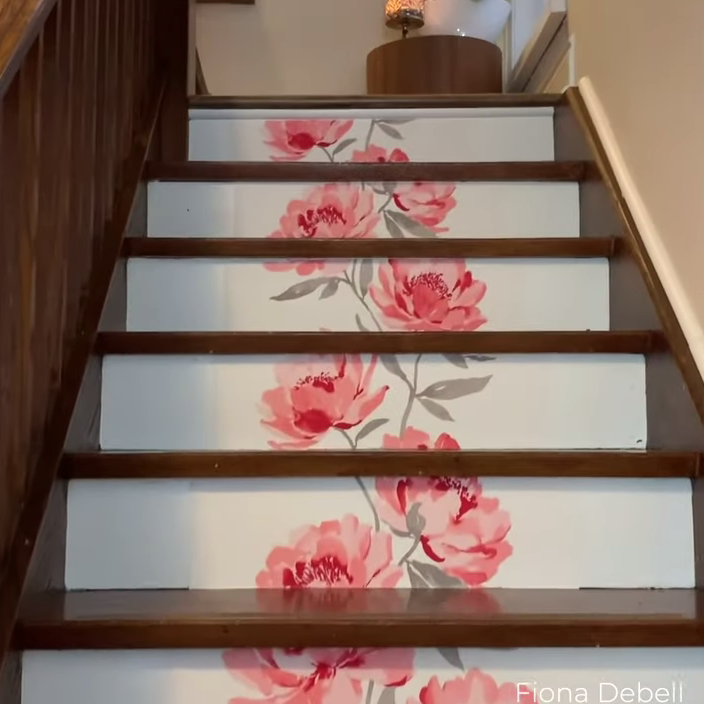
Now, I know what you’re thinking because I thought the same thing. Well, two things. One – that’s so beautiful! And two – I could never do that to my stairs. However, rest assured that by using the Easy Tack spray, you’ll not only be able to reposition the pattern, but the adhesive is temporary as well.
So, with that worry out of the way, go ahead and pick out some pretty wallpaper and measure and cut pieces to fit on your stairs. You’ll want to make them slightly bigger than the actual stair to make sure you cover the entire surface. Then, spray the adhesive on the back and stick it right on, adjusting as you see fit. Trim up the edges, and you’re all done!
Chair Makeover
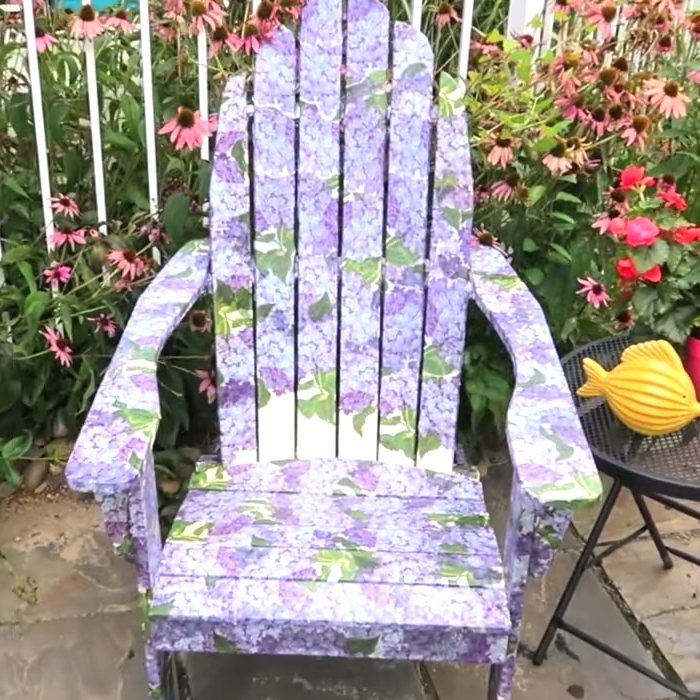
Here’s another gorgeous DIY that seems almost impossible turn a plain Adirondack chair into a beautiful floral masterpiece with some glue, napkins, and sealant. Yup, you read that right; the bulk of this pretty project rests on napkins.
Grab some floral napkins (or any kind of napkin if floral isn’t your thing), and cut out shapes until you have enough to cover the desired area of the chair. Mix Elmer’s glue with some water and paint it directly onto the chair, followed by a few napkin cutouts. Paint more of the glue mixture over the napkins, and continue painting, sticking, and painting until everything is covered. Once dry, seal everything up with several coats of your favorite all-weather outdoor sealer, and enjoy your “new” chair!

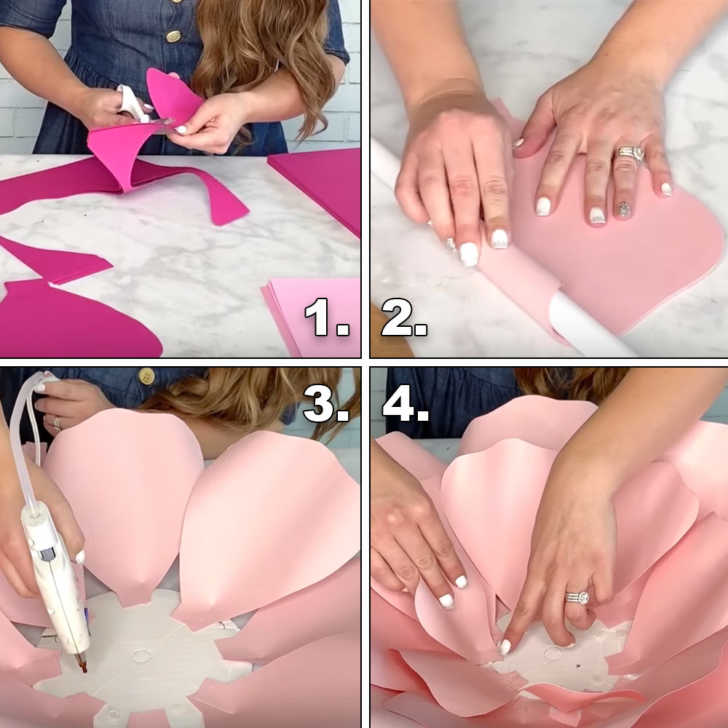
Floral Wall Hanging
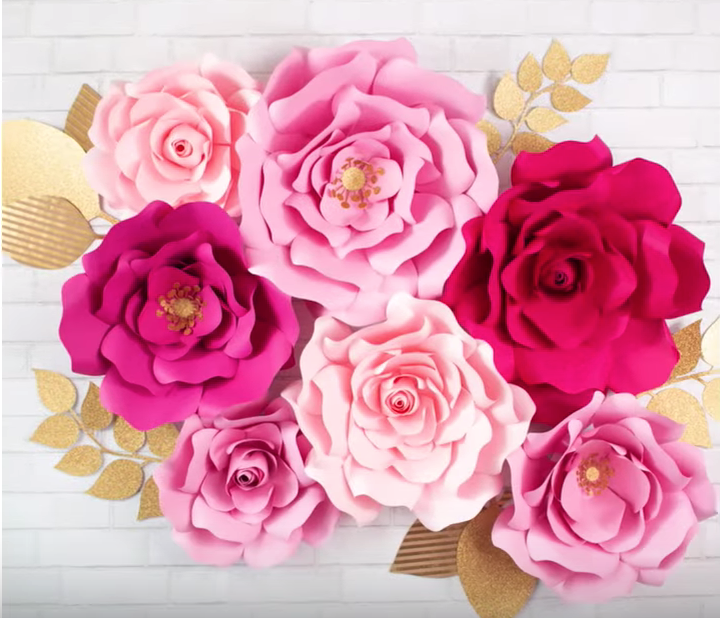
No one is going to ignore these wallflowers, am I right? Seriously though, how gorgeous are these? Grab some colorful cardstock paper and cut out petal shapes. Roll the tips of the petals slightly and then cut a slit in the base of the petal, overlapping the two flaps of paper so the petal scoops up into a little half-bowl shape. Continue adding petals, getting smaller and smaller with each round. Add leaves and hang up this pretty decor to give any room an extra pop of color!
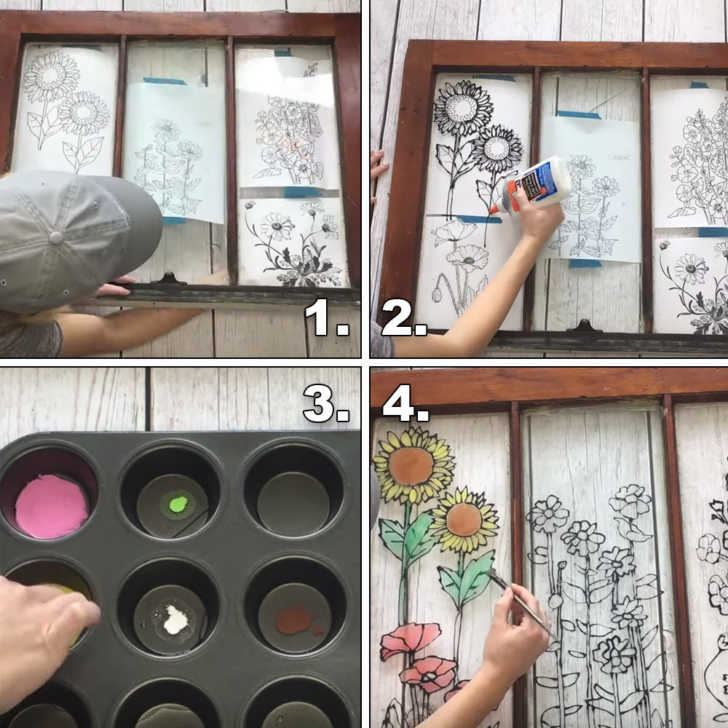
Faux Stained Glass
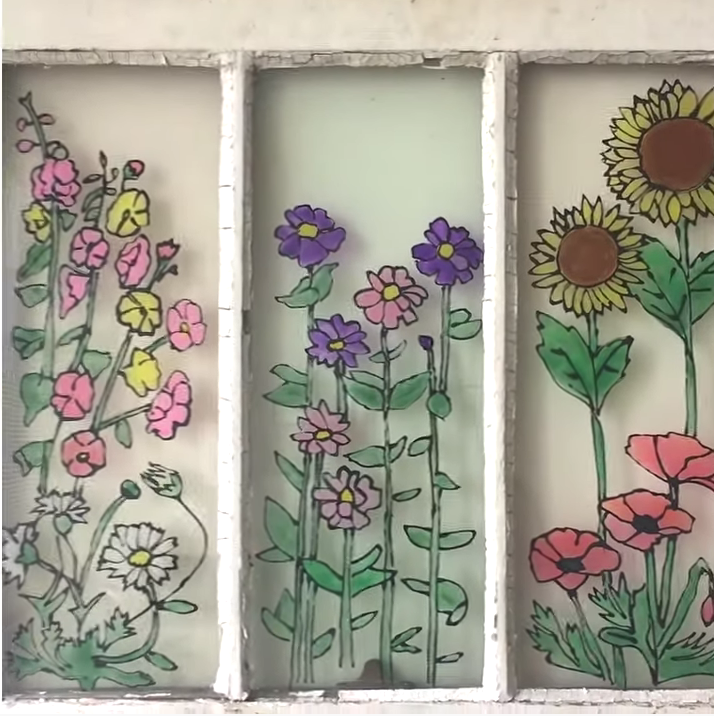
This is one of my all-time favorite DIYs. I’ve seen several versions of this project and have done it myself a few times. It’s so simple, and yet so beautiful! Start by printing out the design you want. You can freehand this too, but I’m not that confident in my drawing abilities. Once you have your design taped on, mix a bit of black paint into a white Elmer’s glue bottle and mix it up. Trace the lines of the design on the other side of the window and let it dry for a day or two, depending on the design.
Once it’s dry, mix. few drops of different colors into some clear glue and paint in the sections as you see fit. Again, you’ll need to let the window dry for a few days, but once it’s done, you’ll have such a beautiful piece of art! The kiddos will definitely want to help with this one.
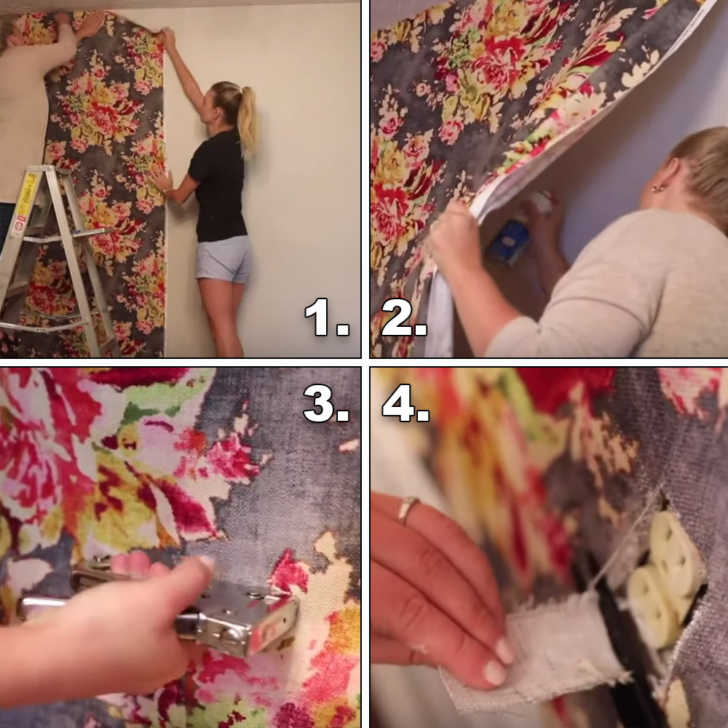
Floral Accent Wall
Here are some more wallflowers that refuse to be ignored. Sure, you’ve heard of accent walls, and even textured walls, but have you ever glued fabric onto your walls? No? Why not give it a shot! You’re going to need some help with this project. Cut and measure fabric swaths and attach them to the top of the wall where it meets the ceiling with a few staples. Don’t worry – you’ll be able to remove the staples and easily fill the holes in much like you would a nail hole from hanging a shelf or a picture.
Once the fabric is on straight, grab some more Easy Tack spray and secure the fabric to the walls. Go slowly and stop to smooth the fabric down often. Once dry, cut out holes for electric sockets and light switches. Trim the edges and admire your new wall!
See the rest of the projects in the video below!
More to Explore
SKM: below-content placeholderWhizzco for CRH