Milk And Cookie Candles
These are adorable! AND they are really easy to make. Win win!

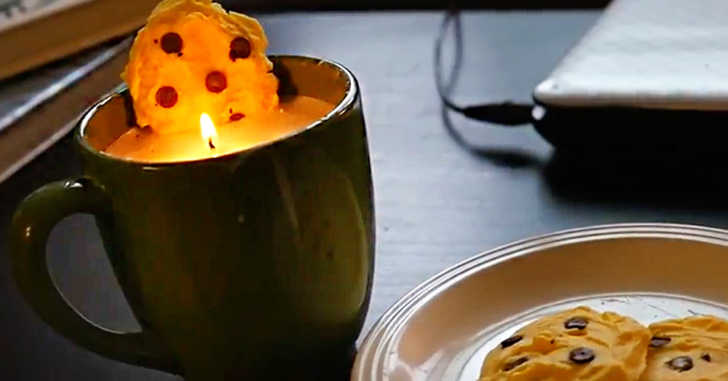
This is adorable!! And you wouldn’t believe how easy it really is. If you have some wax (or an old candle to reuse), crayons, and a mug you don’t mind repurposing into a candle, you’re good to go. Just melt the wax with crayons for color, add some scented oils (we like vanilla and cinnamon), mix, and pour. The key is getting the right consistency. For the cookies, you’ll need to add in some wax after melting the initial wax, to help thicken it up a bit. Then just stir every once in a while until you have a nice, smooth consistency, almost like pudding. Shape the wax into cookie form, and add a few pieces of brown crayon for chocolate chips. Then you’ll have to rig up a little something to hold one of the cookies in place while the “milk” hardens, but once you have that figured out, you’ll have your candle in no time. See how we did it in the video below, and get the full supply list as well as instructions beneath the video.
Supplies:
– Soy wax flakes
– Yellow crayon
– Brown crayon
– Vanilla essential oil (or vanilla extract)
– Microwave or double broiler
– Wicks
– Mug
Directions:
1. Divide wax into two batches. Melt the first batch in the double boiler or microwave with a yellow crayon. Take melted wax off of the heat, and stir while cooling.
2. When wax cools enough to form a dough-like consistency, scoop out and form 3 cookies. Cut the brown crayon into little pieces, to form chocolate chips. Add the brown “chocolate chips” on top of the cookies, and let dry completely.
3. While these are drying melt your second batch of wax in the double boiler or microwave, adding a few drops of vanilla in while stirring.
4. Place a wick in the center of the mug, and wrap the long end around a pen or pencil to set on top of the mug and keep wick in place.
5. Carefully pour the melted white wax into the mug, making sure to keep the wick in place.
6. Let the wax cool a little, but while still warm, place one cookie inside the “milk,” sticking up out of the wax about half way. Hold the cookie in place while the wax cools, or set up more pens & pencils to hold it for you.
7. When everything is hardened again, remove the pen from the wick, and trim to size.
8. Ta-da: Milk and Cookie Candles.
More to Explore
SKM: below-content placeholderWhizzco for CRH