

Stained glass is gorgeous and can add a charming, decorative touch to your home. It’s also hard to make really well, which is one of the reasons it’s wildly expensive. Granted, you can salvage old stained glass if you’re lucky, or you could try to make a DIY version. But for those who want the look of stained glass but lack a huge budget, a secondhand hookup, or the necessary artistic abilities, there happens to be another option: fake stained glass.
A couple of years ago, I came across a window film that promised to be easy to apply, simple to remove, and provide both the stained glass look that I wanted as well as the privacy I sought. I loved the result and added it to not only my front windows but also a side window and the front door. Admittedly, because it was my first time trying a window film like this, I made a few mistakes, like cutting the pieces too small and getting a little mixed up when it came to placement.
I have since moved to a new house with large front-facing windows, and I was eager to give the fake stained glass another (hopefully more successful) attempt.
This time around, I wanted to apply the fake stained glass for three reasons. First, I love the look of stained glass and felt like it might add an extra artistic flair to my living room. I also wanted a little more privacy (I don’t like the idea that people passing by can see into my home), but I didn’t want to completely block out the light that my windows let in. And finally, I happen to have a very alert Chihuahua who barks at every single thing that passes my house. While I appreciate the fact that he acts as an alarm dog, I don’t need him freaking out every two minutes.
And while I thought that tackling a fake stained glass project would be simple, it was surprisingly difficult for a reason that I didn’t anticipate. BUT read on to find out how the process can be much easier — and a total success — if you’d like to try it out for yourself.
Before the Fake Stained Glass
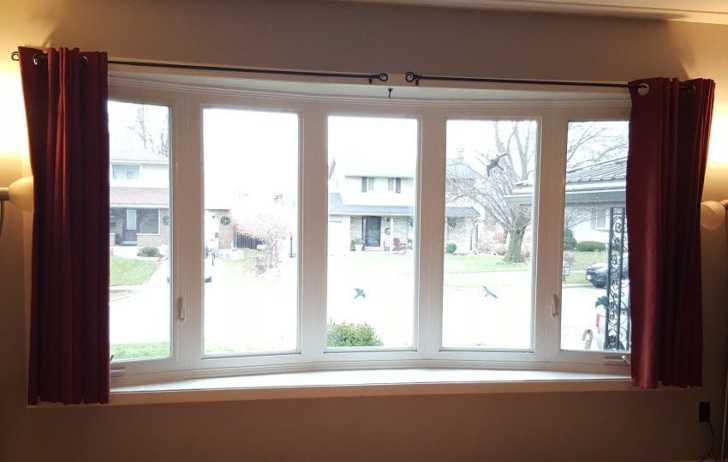
I adore the windows in my living room and didn’t want to completely cover them all. Covering five large panes would probably be a little too much unless I wanted a room that looks more like a medieval church. (Please excuse the fake bird silhouettes on the windows. They help prevent real birds from flying into the glass.)
Tracking Down the RIGHT Fake Stained Glass
Although I had ordered the stained glass film from Amazon the first time around, I had spotted some at Home Depot recently, so I decided to check out what my local store had to offer. Unfortunately, Home Depot had only a few options available, and on top of being a little pricey, they weren’t the same quality as the film I had used previously, which had a glass-like texture that was bumpy in some areas and smooth in others with defined details (the ones I found in the store just looked like images printed on thin plastic).
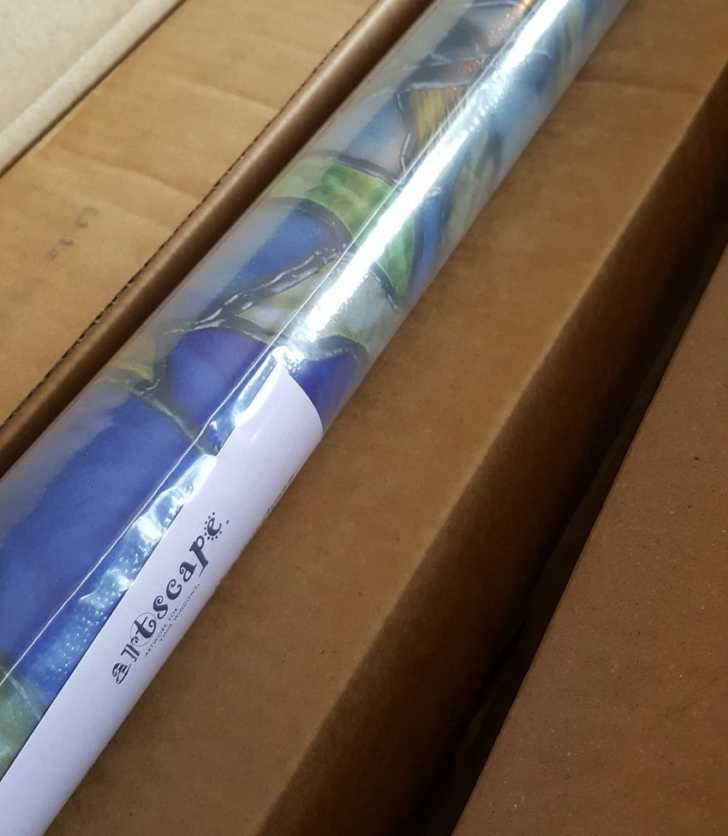
I ended up checking out Amazon again, and after reading the reviews, chose Artscape’s Clematis Window Film (61 by 92 cm).
With my order placed, I thought things would be rolling right along. However, a postal strike in my area ended up delaying shipment far longer than expected. When my package finally did arrive, I was worried that it still wouldn’t be the fake stained glass that I wanted. Thankfully, when I opened the box, all three rolls had the exact product that I had worked so hard to track down. I was thrilled!
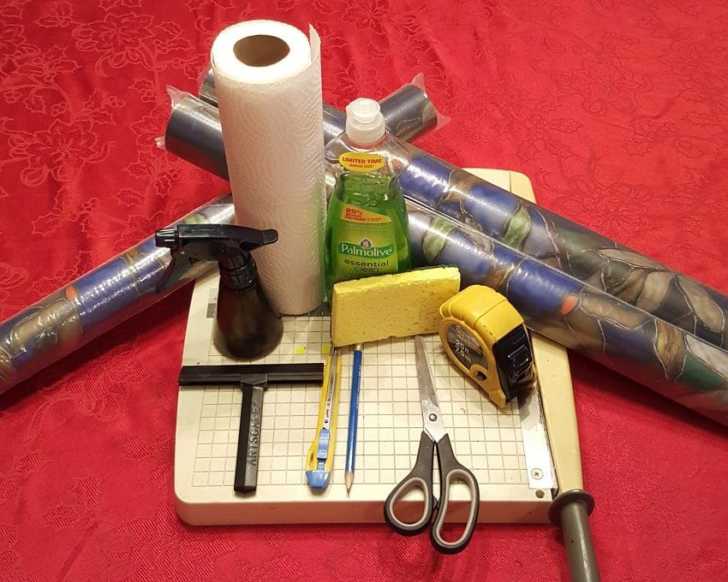
Along with the stained glass film, a little squeegee was provided. Other than that, you’ll need water (preferably in a spritz bottle), soap, a sponge, paper towel or a rag, a pencil, a ruler or measuring tape, and something to cut with, such as scissors, a paper cutter, or a utility knife.
Measuring the Windows TWICE
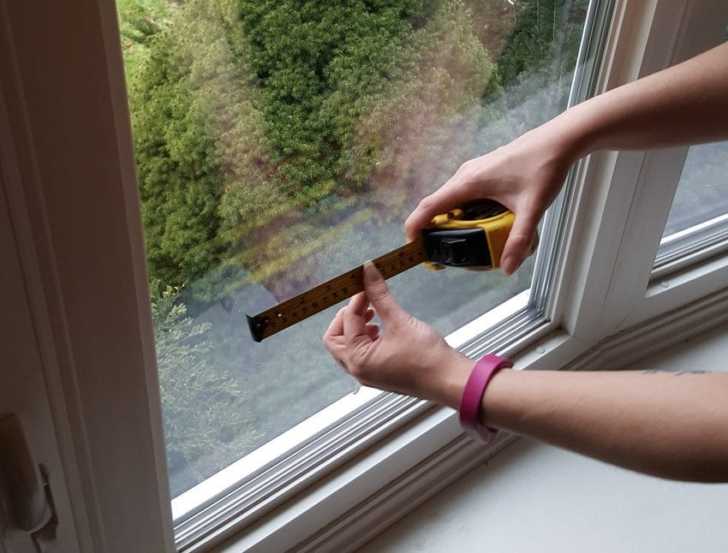
I first decided how much of the window I wanted to cover, which was just the lower part of each pane. Then it was time to measure. Have you ever heard the saying measure twice, cut once? Well, I definitely think that it’s better to be safe than sorry in situations like this, and since I didn’t want to waste or ruin the stained glass film that I had finally gotten my hands on, I measured the windows twice to make sure that when I cut the pieces, they would be the exact size that I needed.
Measuring the Fake Stained Glass TWICE
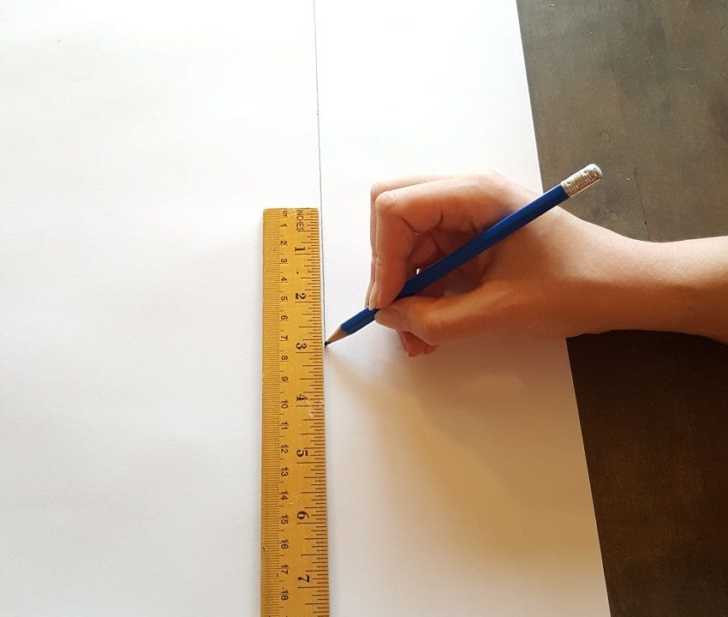
Once I knew what size I needed each piece to be, I measured the same dimensions on the stained glass film. I again checked my numbers, measured the pieces twice, and made sure all of my lines were straight as I drew on the back where I wanted to make my cuts.
Cutting the Fake Stained Glass
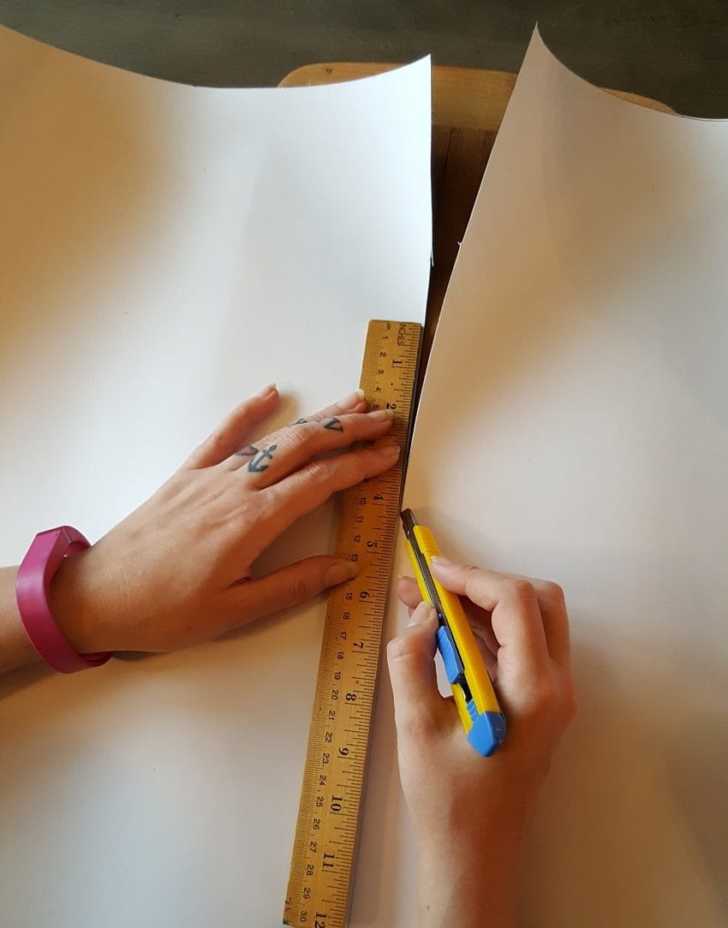
You have only one chance to cut the stained glass film, so be sure to take your time and cut it perfectly straight. I used a ruler to keep my hand steady. I also debated using scissors or a paper cutter, but because of the size of the pieces I was cutting and the thickness of the film (as well as the backing paper), I decided that the utility knife was the best option.
Organizing the Pieces
Because of how I had to cut each piece to fit the windows, the pattern wouldn’t be continuous between each pane. However, I still wanted to do my best to align the pattern as much possible, keeping the shades and colors together. I set the pieces out along the windows and organized them in a way that I liked before I started applying them to the glass.
Prepping the Windows
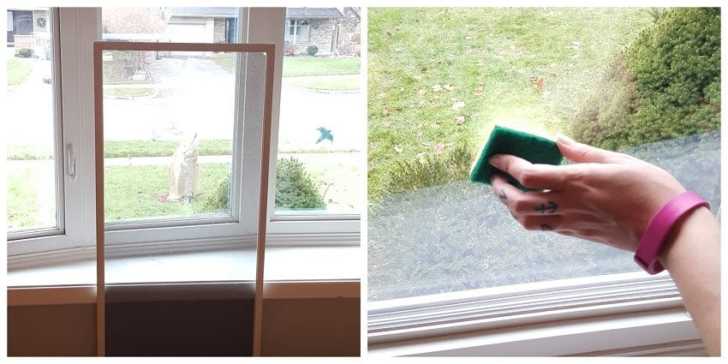
Before applying the stained glass film, I needed to remove the screens from the outer two windows (the inner three windows don’t open, so they don’t have screens). I then got some soapy water and used a sponge to clean all the dirt and dust off the windows. I removed the soapy water with a paper towel.
Placing the First Piece
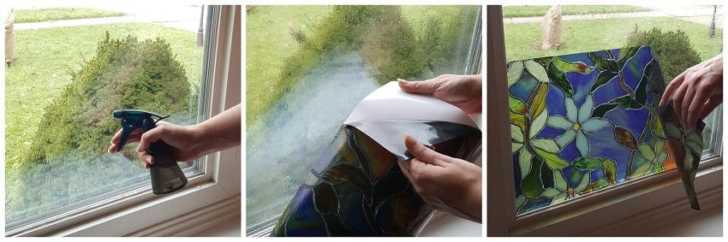
I then spritzed water on the window where I would be placing the stained glass film, getting the entire area wet. From there, I simply peeled the film away from the paper backing and carefully applied it to the window. The film isn’t sticky on the back, but it is glossy enough to adhere to the wet glass.
The film was incredibly easy to place on the window, and I could keep peeling it off and repositioning it until I had it right where I wanted it.
Using the Squeegee
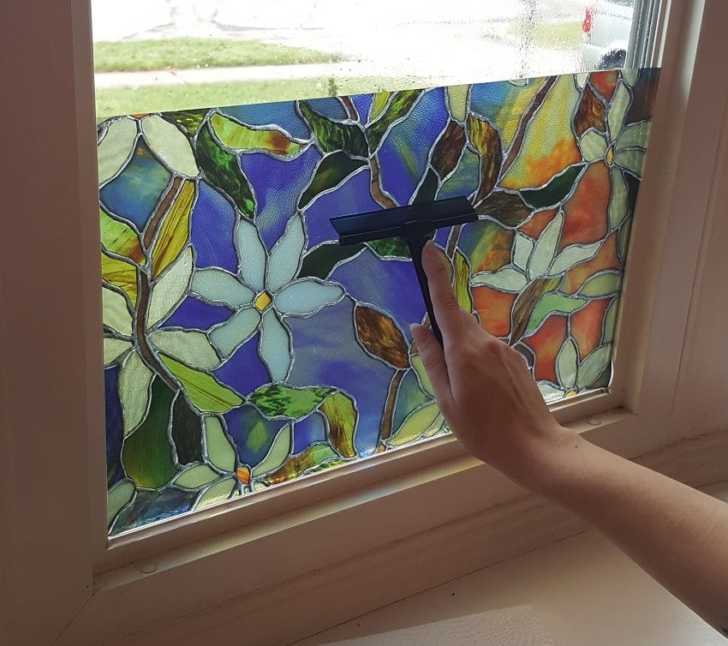
As I mentioned above, the stained glass came with a little plastic squeegee. I gently pulled the squeegee across the entire area to make sure the film was completely flat and firmly stuck to the window pane.
Getting Out the Bubbles
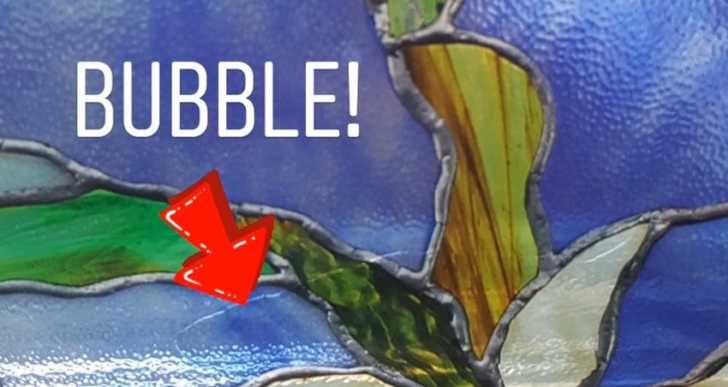
I also wanted to make sure to remove all the air bubbles that had popped up under the film. Whenever I came across a smaller bubble, I used the squeegee to push the air to the top until the bump was smoothed out. I also had a couple of larger bubbles that resisted the squeegee, so I simply lifted the film off the window and placed it on again, flattening it to avoid big air pockets.
Trimming the Excess
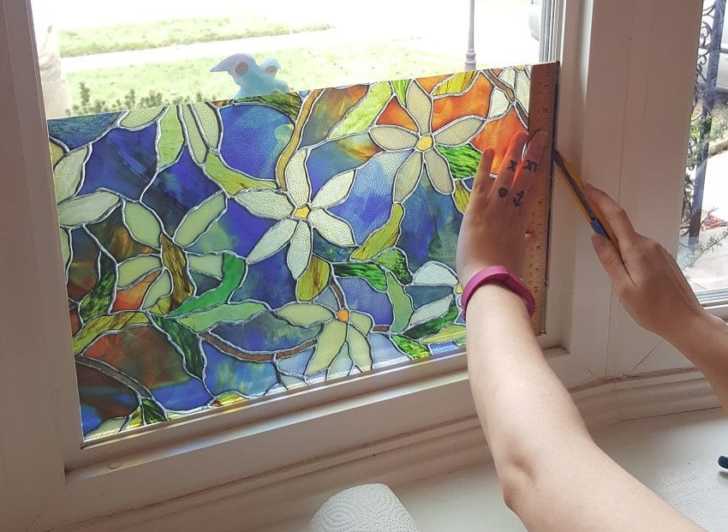
Despite measuring both the window and the stained glass film (twice), I still had a little extra film on one side of the piece. To remove this, I placed my ruler against the window trim and used the utility knife to slice off the excess (while being careful not to scratch the glass beneath).
Repeating the Process
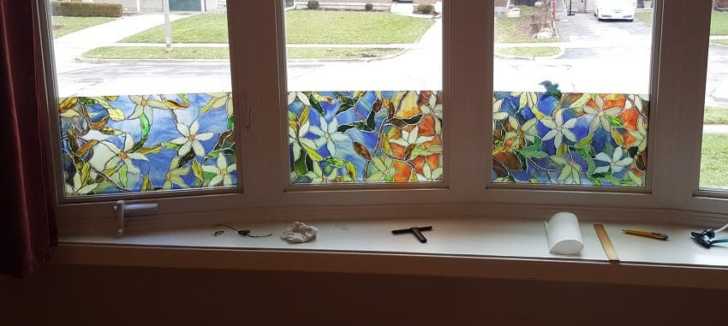
Once I had the first piece of stained glass film on the first pane, I continued the process on the rest of the windows. While I took my time measuring things out, putting the film on the panes of glass was incredibly quick. I had all five pieces up in under 15 minutes.
Final Result
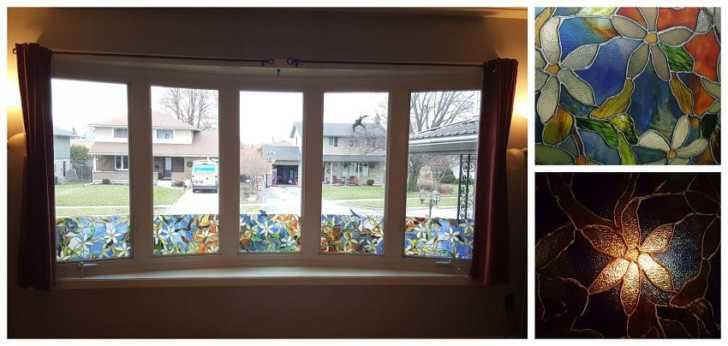
I was pleased with how easy it was to put up the stained glass film, and I love the fact that I can simply wet it and peel it off if I no longer want it on the window. The film is also resistant to both heat and cold, and it won’t fade in the sun. During the day, the light brightens up each color in the film (unfortunately, I couldn’t get a picture on a sunny day when it really shines), and at night, the stained glass glows in a perfectly dreamy way.
I may add a bit of white trim at the top of the stained glass film so that it’s framed like a separate small window on each pane, but I want to live with the stained glass for a few weeks before I decide. Removing the film alone would be easy, but taking off trim would be much harder.
Whether I go for trim or not, I’m thrilled with the final result, and I think that the added effort spent tracking down the right product and waiting out the shipping delay was 100% worth it. The faux stained glass creates privacy and adds color and an artistic touch to my living room. Best of all, my tiny Chihuahua can no longer spot the dogs walking by and is enjoying a perfectly chill day where he doesn’t feel the need to release a barking fury every five minutes. Success!
SKM: below-content placeholderWhizzco for CRH