Make Your Own Neon Lights In 3 Easy Steps!
Spruce up any wall with a pop of color in this unexpected and unique craft. All you need is a rope light, some wire, and industrial strength glue.

These DIY neon lights would be so fun to do in a teen’s room, or for a festive party decoration! Spruce up any wall with a pop of color in this unexpected and unique craft. All you need is a rope light, some wire, and industrial strength glue. We use E6000 glue for a lot of projects around here, so it was easy to find a tube floating around somewhere. The most difficult part is the waiting. You want to make sure every thing is secure and dry before hanging this beauty up. We recommend pinning everything down with the clothespins (or binder clips), and glueing in sections. Once everything is glued, it’s best to let everything set overnight. Be careful not to glue any clothespins to your project, or else they may be stuck for good! You can always apply a little vaseline to the inside of the clothespin before clipping it onto the wire.
This project was so fun, and the possibilities are endless! You could make a heart, a star, or write your name… whatever floats your boat! Check out the video below, and see the full instructions at the bottom of the page. Happy crafting!
Supplies:
– Marker & paper
– Wire
– Pliers
– E6000 glue
– Neon rope light
– Clothespins
Directions:
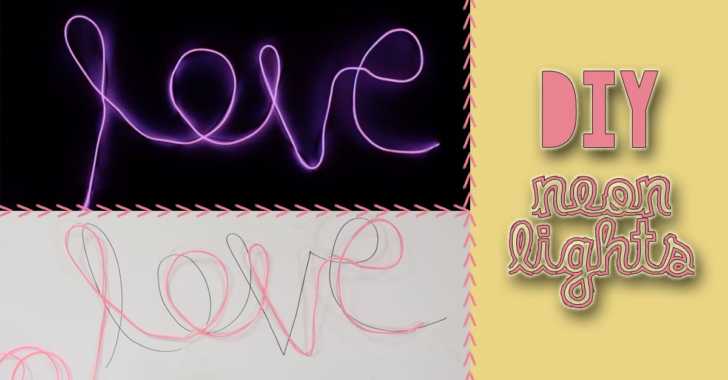
Write the word you’d like to make on a piece of paper – remember to use a continuous stroke all the way through.
Use pliers to bend the wire into the shape of the word, using the paper as an outline.
Once the wire is in the correct shape, apply glue a few inches at a time and adhere the neon light rope to the wire. Use the binder clips to hold the light to the wire.
Once dry, plug it in and enjoy!
SKM: below-content placeholderWhizzco for CRH