
Who doesn’t love a new, pretty decor item like a vase? The only problem is, the large vases we love cost anywhere from $50 to $100! There is, however, a solution. This DIY vase made from things you probably already have around the house. Free, beautiful vase, anyone? We’re totally in! Plus, we get to craft, which we love to do anyway. Check out the step-by-step tutorial below on how to make a lovely vase for practically no cost!
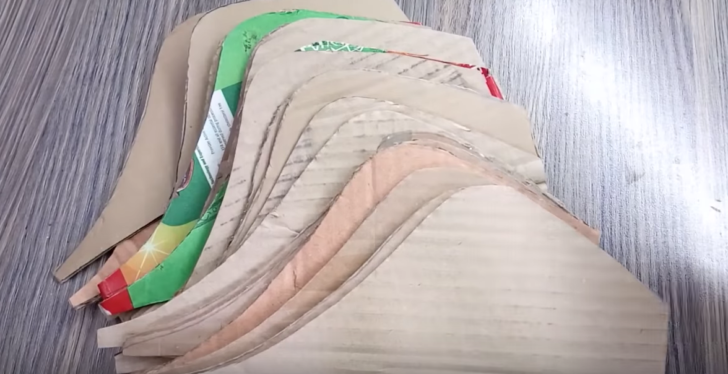
1. Cut Cardboard
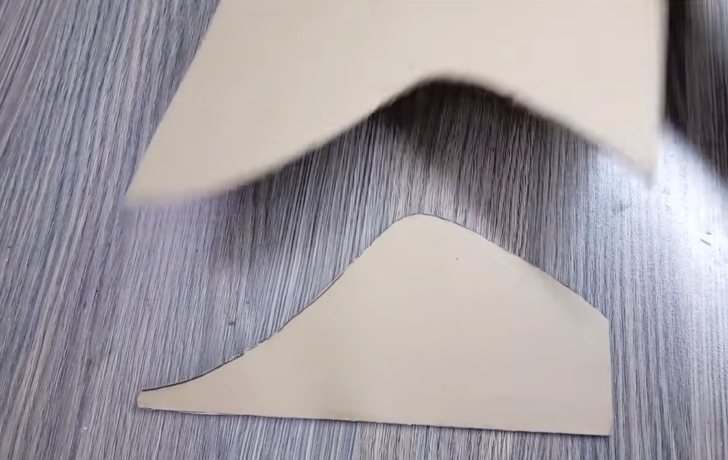
First, trace out a design on cardboard. This will be the basic shape of your vase. You’ll want 15-20 of these shapes, but have materials on hand to make more if you think it nees a few extra pieces to fill it out.
2. Glue To Center
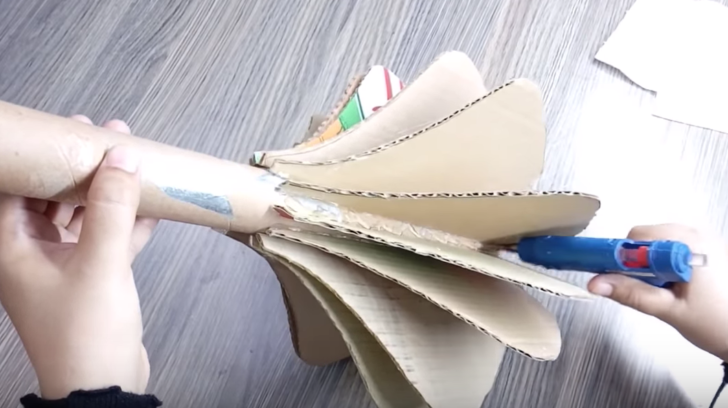
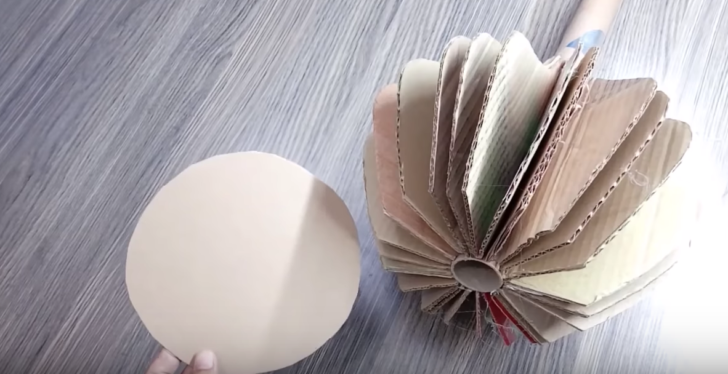
Once you have your shapes cut, grab a cardboard tube of sorts – either a paper towel roll, the cardboard center of a roll of aluminum foil, or something of that nature. If you’re going for a rather large vase, you can stack several tubes and secure with hot glue. Then, hot glue your shapes to the center, making sure to fill it out nicely so there aren’t too many gaps. Finally, cut out a round piece of cardboard and glue it to the bottom.
3. Tape & Shape
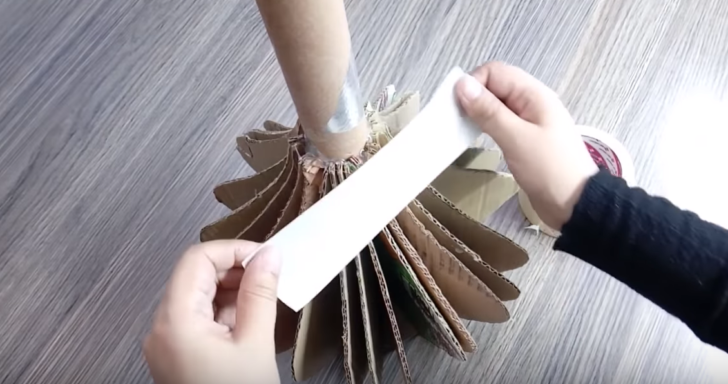
Next, grab a roll of masking tape and begin covering the bare bones of the vase. You can use the tape to shape your vase a little more. Make sure you are using masking tape, as other tapes will cause problems in the next step.
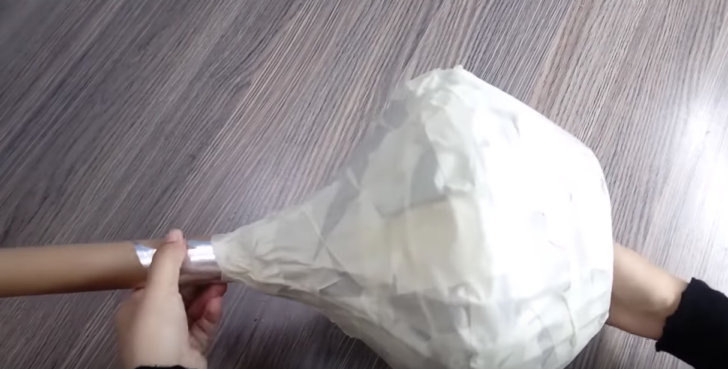
4. Plaster Of Paris
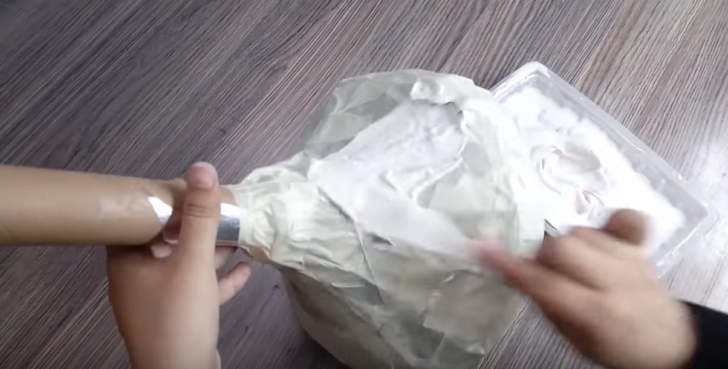
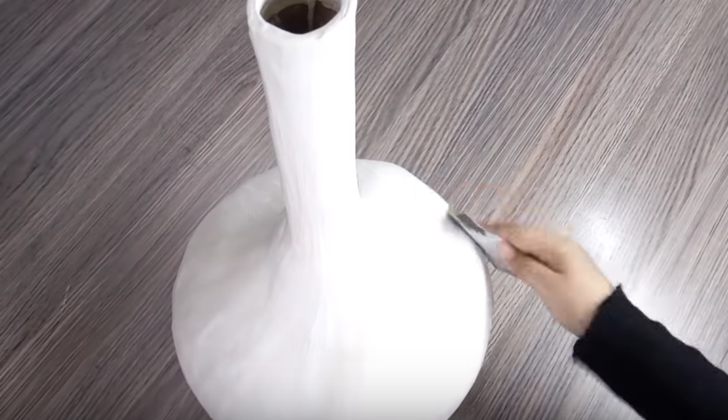
After your vase is completely covered in masking tape, mix a packet of Plaster of Paris and water according to the directions on the packet. Paint the Plaster of Paris on in a nice thick layer. The masking tape has a matte surface and a bit of texture, as opposed to duct tape, which is why the Plaster of Paris will stick to it. Once the Plaster of Paris is dry, sand the vase so the surface is nice and smooth. You can do a bit of shaping here too. If there are cracks, simply fill them in with more Plaster of Paris and sand them down once they dry.
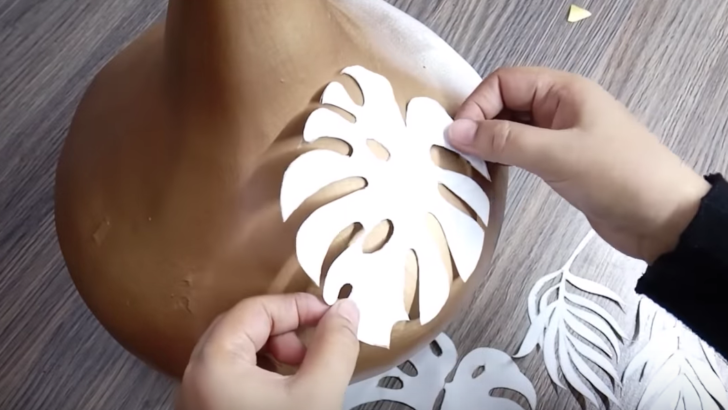
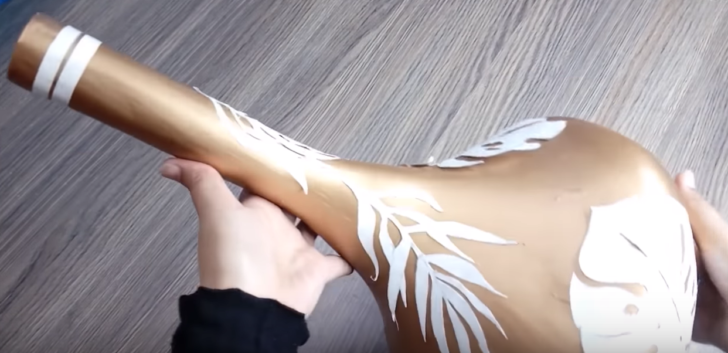
5. Stencil & Stick
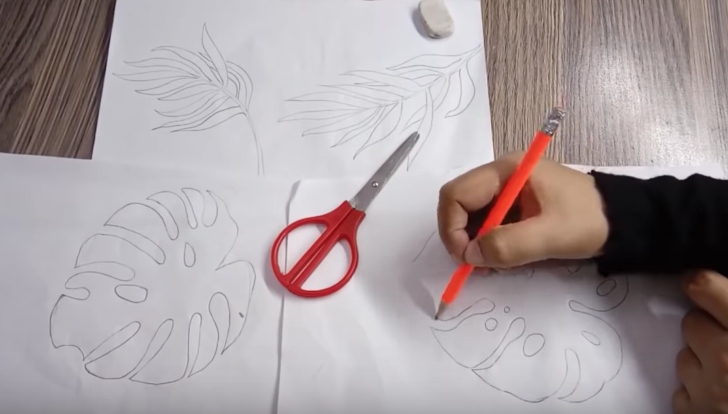
Spray paint your vase in an accent color of your choice. Then, trace out different designs on sticker paper. Once the vase is dry, stick the designs right over the paint.
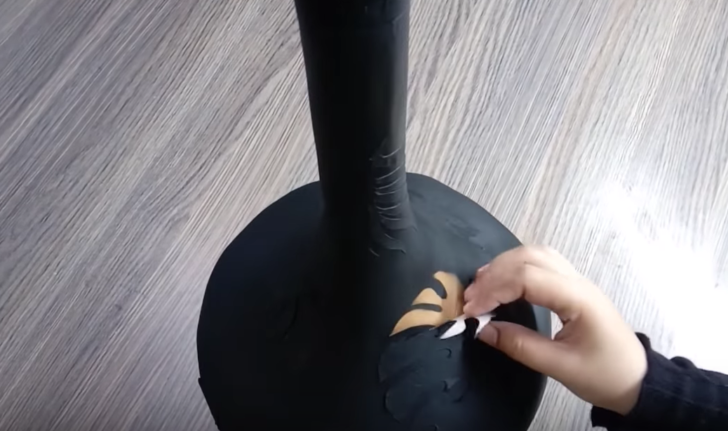
6. Paint & Peel
Spray paint a second color over top of everything – stickers included. Then, peel the stickers off to reveal the color underneath.
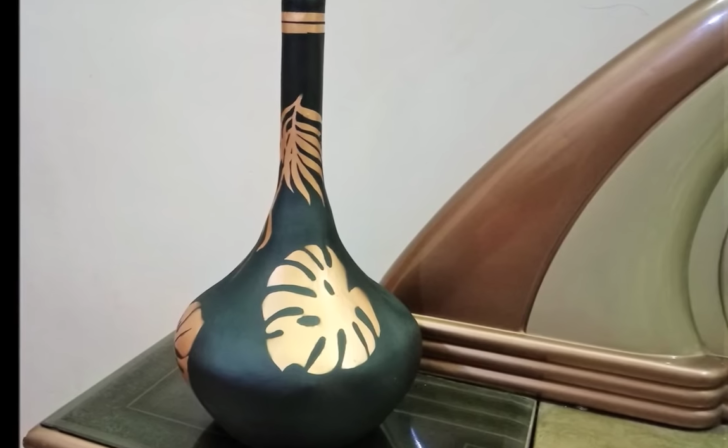
Finished Vase
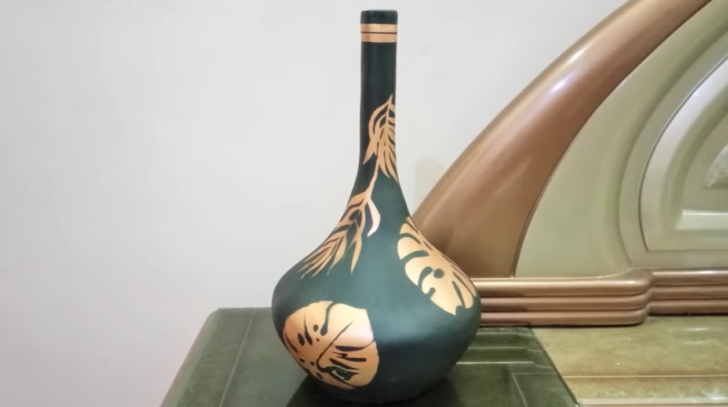
Didn’t this vase turn out great? We are totally impressed with how good this looks. No one would ever guess it’s made of cardboard and tape!
Watch the video below for more detailed instructions.
[media height=”270″ width=”480″ provider=”youtube” type=”iframe” src=”https://www.youtube.com/embed/Dh2x-0H1CNc?feature=oembed” ad=”true”]
SKM: below-content placeholderWhizzco for CRH