These Spooky Halloween Lanterns Are Easier To Make Than You’d Think!
Make this Halloween craft on a budget!

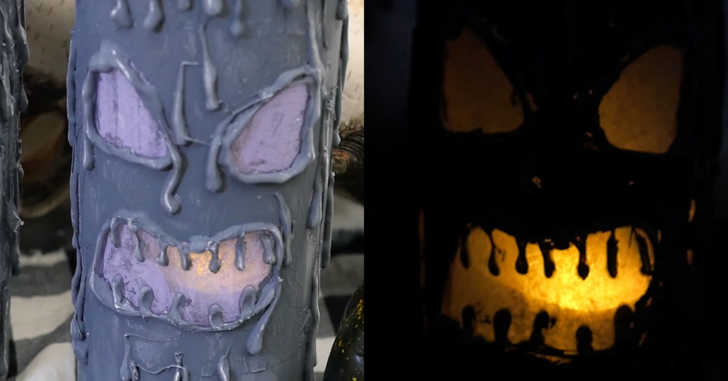
Halloween will be here before we know it! I love going all out for Halloween – crafts, candy, and costumes! These spooky lanterns are such a fun and easy craft to do, and they turned out amazing! I’ve already gotten so many compliments on these guys, and I’m planning on making a few more to line the front porch for trick-or-treaters!
There are two keys to creating the perfect spooky lantern. First, strategic hot gluing. You have to mimic the way a well-used pillar candle would melt. Second, chalk paint. I only had white chalk paint on hand, so I tried mixing some black acrylic paint in and it turned out grey. I actually really like how the matte gray color turned out, but obviously, you can but black chalk paint for an even creepier look!
I just used what I had on hand for tissue paper – and purple is one of the traditional Halloween colors. Yellow, orange, or green would all look great as well. Of course, if you’re not into the “spooky” Halloween decor, you can always make a funny face or a smiling face!
Supplies:
– Tall drinking glass
– Tissue paper (purple or green or any color you want)
– Pencil
– Craft glue
– Hot glue
– Chalkboard paint
– Chalk
Directions:
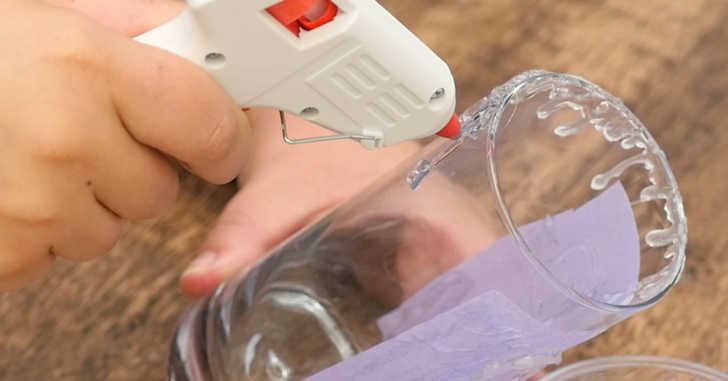
1. Wrap the tissue paper around the glass and draw an outline of a spooky face – eye holes and a mouth.
2. Cut a square around the face and glue it to the glass.
3. Add texture by outlining the face with hot glue.
4. Once you’ve outlined the eyes and mouth, start from the top and add “dripping” lines of glue to look like wax. Continue adding these drops of glue around the top and around the body of the glass.
5. Add details in the face – drooping eyes, teeth, etc. with the glue.
6. When it all dries, paint a layer of chalk paint on the glass, making sure to cover the glue. Don’t get any paint in the eye holes or mouth hole.
7. Once it’s dry, go over with chalk to add texture.
8. Add more layers and highlights with chalk.
SKM: below-content placeholderWhizzco for CRH