Quilt Care: How to Mend an Old Quilt
Quilts can last for decades if you care for them properly!

Maybe it’s something your grandmother sewed, maybe it’s something you found at a flea market, but no matter where it came from, an older quilt can be as fragile as it is beautiful. If you’ve noticed that seams are coming apart or holes are forming, then you might want to try a little bit of repair work.
Many quilters agree that these kinds of fixes should be done sparingly, but if the quilt is coming apart at the seams it’s one thing; if the quilt’s blocks don’t match up perfectly, that might not be reason to try and do repairs. But if you’re looking to make some minor fixes so the quilt stays in good condition, read below for a few tips!
- Examine the quilt
As Quilting Board suggests, it’s good to start by doing a detailed check of the entire quilt and making notes of damage along the way so you know exactly which problems need fixing. You can write down what techniques you think you’ll need to use to repair the quilt, what color fabric needs to be replaced, etc. It’s good to note everything ahead of time so you can make a solid plan for which problems to fix first, and it’s also good to document all the repairs after you’ve made them.
- Stitch it up
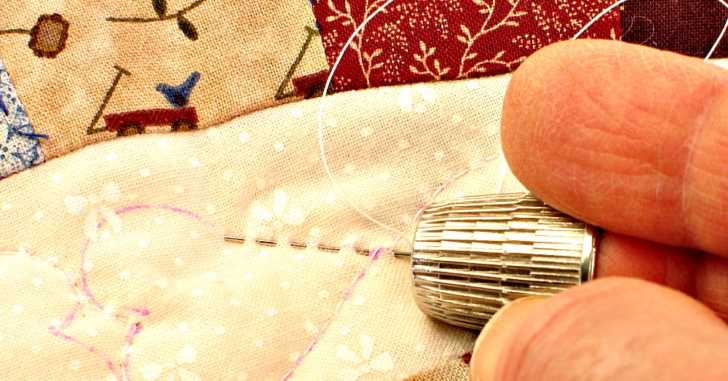
For the mending that involves re-stitching, try to hand-stitch and match the technique used elsewhere in the quilt whenever possible.
- Patch it up
It sounds simple, but sometimes a patch can do the trick. Click here to read some tips from Sew Mama Sew, which has a few different techniques on patching holes. You might not have an exact fabric, but that’s the beauty of quilting as there are already tons of different fabrics featured, so you can find a fabric that matches pretty well with the color scheme and material.
If you can find a similar or the same fabric, however, that’s even better. You might be able to sew a patch or strip that fits perfectly over the worn or tattered part of the quilt, which makes for a flawless fix. Click here to read a great tutorial from Instructables on making these kinds of patches.
- Don’t remove fabric
Instead of trying to take the quilt apart, simply sew over the existing material when you’re trying to patch holes or wear. It’s a lot easier on the fragile quilt, and it’s also easier than trying to take the quilt apart and re-sew the entire thing.
- Consider ‘Tear Mender’ adhesives
Lots of craft stores carry adhesives called ìtear menders,î which are designed to quickly bind tears in all kinds of different materials (cotton, leather, etc.). They typically dry quickly and are acid-free, which is ideal for quilts, and could be helpful when you have a delicate tear that’d be tough to sew ñ or simply as an alternative to hand-stitching every little tear.
- Keep the whole quilt in mind when doing repairs
This is a really helpful suggestion from eHow and if you’re working to fix one repair, be aware of where other problem spots are. You don’t want to move the quilt a particular way and make a different problem piece worse, or put a lot of stress on a weak spot while trying to fix something.
- Save re-dos for extreme situations
In most cases, there are lots of ways to patch holes, mend seams, and avoid major reconstruction. Make sure you’ve exhausted all those options before really ripping apart the quilt and trying to make a lot of major renovations. Sometimes, however, a quilt needs a lot of work ñ click here to see an example of such a quilt, repaired by Sew Kind of Wonderful to look like new. This can yield great results, just make sure that it’s the only option before totally re-doing things.
It’s also good to think about ways to prevent these problems like taking extra care when washing them, storing them properly so bugs and mice can’t cause trouble, etc. With some TLC, quilts can stay in good shape for decades and decades!
More to Explore
SKM: below-content placeholderWhizzco for CRH