
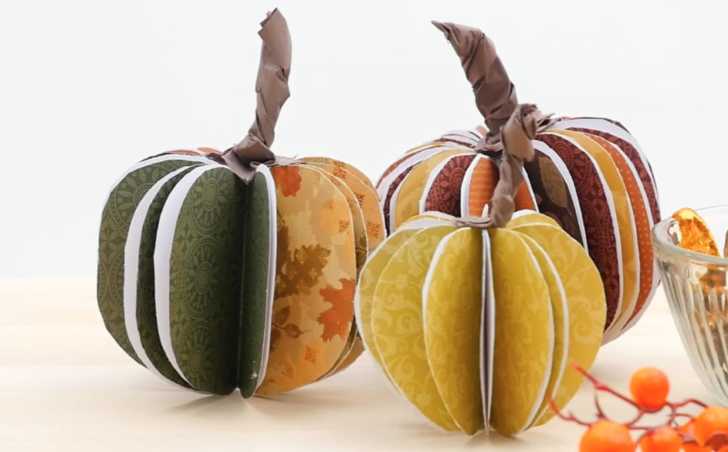
I don’t know about you, but we’re all about the pumpkin decor this time of year! We are, after all, in full Pumpkin Spice season. So why not celebrate with these adorable paper pumpkins? We promise they are so easy to make, and they would go even faster with some help from the kiddos!
We used some leftover autumn-themed scrapbook paper to make these pumpkins, but if we could do it over again we’d definitely use two-sided scrapbook paper to get even more of those autumn colors and vibes in these pumpkins!
Follow along with us in the tutorial below and keep scrolling to find the written instructions! If you’re looking for more stellar pumpkin crafts, check out these felt pumpkin bags and pumpkin coasters!
Supplies:
– 5-10 sheets of decorative paper (per pumpkin)
– Hot glue
– Scissors
– Binder clips
– Masking tape
– White stock paper
Directions:
1. Trace out pumpkin pattern on the white paper.
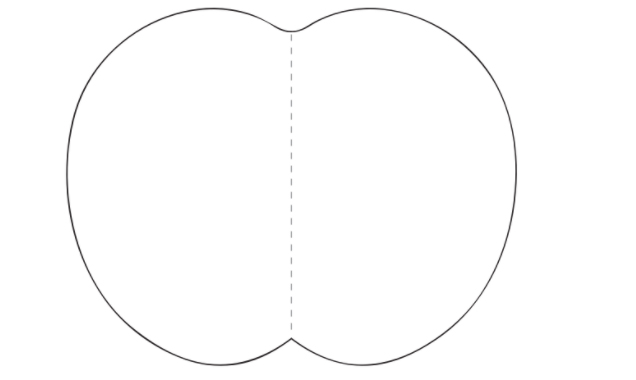
2. Attach to a stack of decorative papers and cut around.
3. Fold each cutout in half and stack.
4. Hold the stack of folded cutouts with binder clips at each end, and glue the flat, folded edges of the stack together.
5. When cool, fan out the pages and glue the two ends together to form the pumpkin.
6. For the stem: cut a rectangle from some crepe paper (or any lightweight paper) and and twist it into a stem. Glue to the top of the pumpkin.
7. Optional: cut out leaves from contrasting paper and glue to the stem.
SKM: below-content placeholderWhizzco for CRH