Bring A Little Zen To Your Cubicle With This Stunning DIY!
Seriously, these could not be easier to maintain.

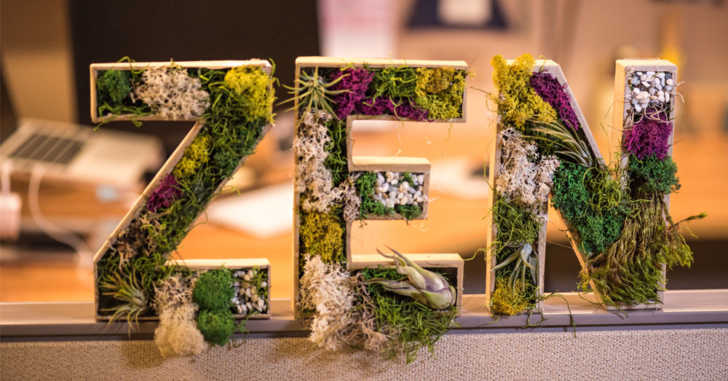
This is one of my favorite DIYs we’ve ever done here at Crafty House! I’m just in love with the finished product, it’s sitting right here at my desk as I type, and it’s definitely helping me keep calm and write on. With just a few inexpensive supplies, these moss letters can be yours in just a few short steps! We used a combination of assorted preserved moss, pebbles, and air plants to achieve this wooded forest look, but you could easily get a more tropical feel with pebbles, plants, and sea shells!

Once you cut off the front of your selected letters, the sky is the limit. Fill ’em up with whatever your heart desires! We especially love the little air plants. If you’ve never seen these guys before, you’re missing out! They don’t need to be planted in a pot, nor do they have any roots. These little guys thrive anywhere you place them. Simply set them in a bowl of water for an hour or so every week, and set them out to dry. Once they are dry, pop them back into your letters and you’re good to go. Seriously, these could not be easier to maintain. They are cheap, too! We bought a five pack from amazon for $8.99.
Get inspired to make your own moss letters by watching the video below! Don’t forget to share your finished product with us in the comments below!
Supplies:
– Cardboard letters
– Preserved moss
– Hot glue
– X-acto knife
Directions:
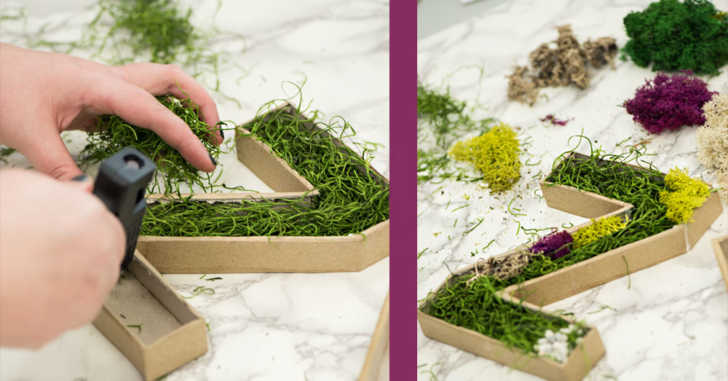
1. Cut out the front section of the cardboard letters and discard.
2. Plan out moss placement. Consider having some of the moss hang beneath the letters, etc. Add in other fun embellishments if you desire.
3. When you like the design, hot glue moss in place.
4. If using air plants, make sure to plan a spot for them so they can be removed and watered every 1-2 weeks.
5. Hang up or set on a shelf for some insta-zen.
SKM: below-content placeholderWhizzco for CRH