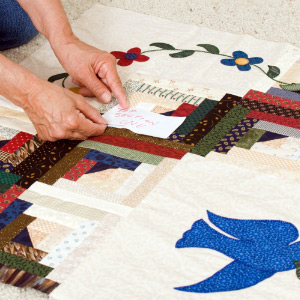
If you have a wall, then you have an amazing canvas for your quilting projects. It’s the perfect spot for a design wall and a place where you can visualize the various steps in the quilting process.
Put pieces together to see how they’ll look, line up different fabrics, and get a good look at the bigger picture with your quilt design wall. You can buy design walls, but it’s just as easy to make one yourself, just follow these simple steps to get started!

Supplies You’ll Need:
- Foam insulation board (thickness of 1/2 to 1 inch; ideally enough to make a board that’s 24″ by 48″ or 48″ x 96″ in size, depending on how big you’d like the wall)
- Batting or flannel design wall from JoAnn Fabrics (click here to see)
- Staple gun or binder clips
- Packaging tape or duct tape
- Self-adhesive hanging strips or adhesive Velcro
- Level
How to Make the Wall:
- Decide whether you’ll be using batting or the packaged flannel design wall from a craft store. The pre-packaged cover has gridlines, which could be helpful for lining up fabrics.
- Cut the batting or flannel design wall so there are 3 to 4 inches of extra fabric beyond the size of the foam insulation board. Smooth the batting or flannel design wall onto the board, you want it to be pretty taut, and then flip the board over. If you’re planning on using multiple small foam insulation boards, wrap each individually with the batting or flannel.
- If you’re using a staple gun, staple the batting or flannel tightly to the backside of the board. Staple or clip one side at a time, start with one side, then staple or clip the opposite side. If you’re using binder clips, secure them around the board’s edges. Add some support to the backing by securing the excess batting or flannel with tape.
- Because the insulation board is so light, you can simply use self-adhesive hanging strips and adhere them to the back of the board if it won’t be moved much. If you want it to be pretty portable and mobile, try Velcro strips so you can easily remove it from the wall. You can also prop it against a wall.
- If hanging it, use the level to make sure it’s balanced.
- Then, get to pinning fabric! Your wall can be as small or large as you’d like, and it’s a great prop for any quilter who’d like a place to visualize designs.
SKM: below-content placeholderWhizzco for CRH