Biscuit, Puff, Bubbles, Whatever You Call It, Every Quilter Should Learn This Pattern!
How to Make a Biscuit Quilt
Biscuits, puffs, bubbles — whatever you want to call them, the overstuffed squares that make up these quilts add extra comfort and character. And if you’ve ever wondered how to make a biscuit/puff/bubble quilt, then you’re in luck — we’ve got all the info you need to craft one of your own! Just read below for the important steps.
- Decide your quilt size
This takes a good amount of math, because as Home Venn explains, a puff quilt has three layers of fabric — the top of the squares, the back of the squares, and the back of the quilt. Each of the “top square” layers should be 1-2 inches wider on every side to account for the stuffing that will be added — it all depends on how puffy you want the squares to be! 1 to 1.5 inches bigger is pretty standard. Keep in mind that the base squares won’t be seen and are purely used to keep the stuffing in place, so scrap fabric is totally fine to use there.
That Home Venn link also has measurements for different size quilts (baby, twin, double, etc.), so you can figure out how much fabric you’ll need.
- Pin the front and back of the squares together
Awaiting Ada has a great visual for this, but next you’ll want to pin the square fronts and backs together (wrong sides together). Because they’ll be different sizes, you’ll want to line up one corner and then pleat the top square a bit so all the corners match up. Leave one side unpinned (you’ll want to put the stuffing in that side) and sew together three of the sides.
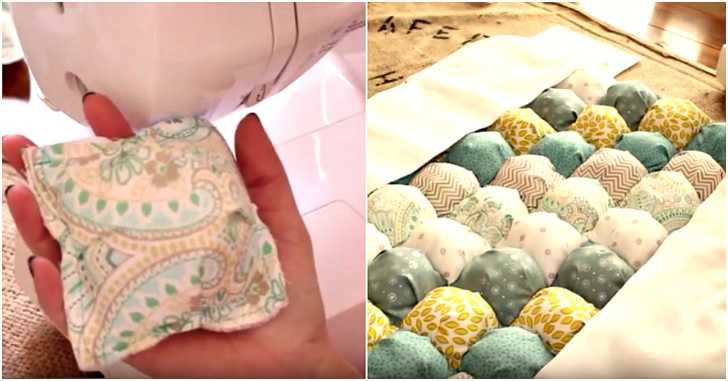
- Stuff and sew
Stuff each square with polyester filling and then sew the last side shut. Arrange the puffy squares as you’d like them to look in the quilt, so you can see it laid out. Then, begin sewing each row of puffy squares together with a 1/4-inch seam allowance.
Alternatively, you could pin and sew all four sides shut of each square and cut little slits in the back of each square, stuffing them from the back and sewing the holes up later. Some people prefer to sew the entire quilt pre-stuffing using this method, and then adding the stuffing last and sewing up the squares before sewing the backing and borders on. Your choice!
- Add the border and backing
Adding a border and backing to the quilt hides the seams and backs of the biscuits/puffs/bubbles, while also adding a nice finished touch to the entire project.
And, voila! You’ve got a comfy quilt — especially perfect for little ones who need something extra soft to lie on. It’s a fun challenge that’s different from the usual quilt, and also offers lots of room for creative fabric designs depending on how you arrange each puffy square. For more, check out the video below! Enjoy!
SKM: below-content placeholderWhizzco for CRH