
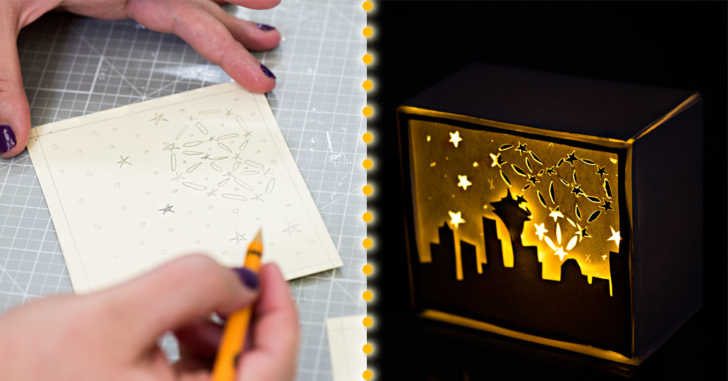
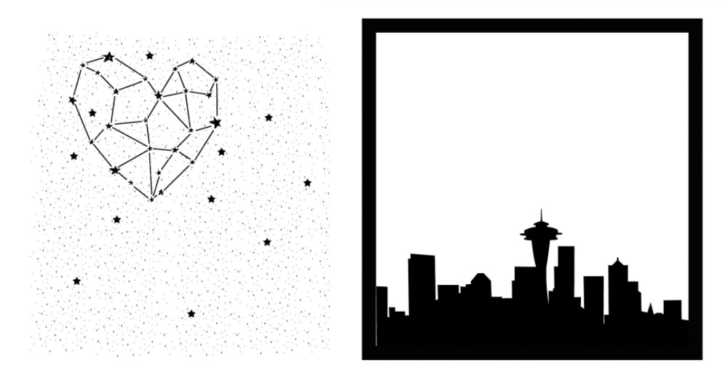
I was skeptical of this craft at first – it looked a little too good to be true. But after trying it out first hand, it really is as easy as 1-2-3: Trace, Cut, Glue! The great thing about this craft is that it can be as simple or as complex as you want. We decided to keep things easy and only do two layers of paper for our lightbox, but if you have an intricate scene in mind feel free to add more layers, remembering to keep a 1/4″ strip of foam in between each one. The sky really is the limit here, and while we love the Seattle city skyline and constellation look, you can do whatever you want! We included the full directions and silhouettes to print at the bottom of this post. Go ahead and see what we did and then try it out for yourself!
Supplies:
– White or off-white cardstock
– Tea lights
– Ruler
– Pencil
– Scissors
– X-acto knife
– Foam core board
– Glue
Directions:
1. Make the frame by cutting 2 pieces of foam core measuring 2.5 x 6.5 inches, and 2 pieces measuring 2.5 x 6 inches.
2. Measure and cut foam pieces to fit and make even corners.
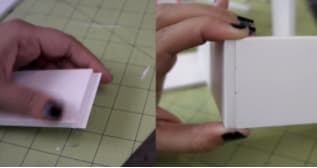
3. Glue box together and let dry.
4. Draw layers of image onto cardstock, remembering to keep a 1/4 inch border around each layer. Back layer = constellation, front layer = city skyline.
5. Cut out eight 1/4 inch thick strips of foam core with the same height as the frame.
6. Assemble and glue in this order: Back layer, frame of 1/4 inch foam, front layer, frame of 1/4 inch foam.
7. When everything has dried, carefully place layers inside of frame. Cut a small section from the foam panel to place LED tea lights, and attach the back to the frame.
8. Place lights in back of frame, and enjoy!
SKM: below-content placeholderWhizzco for CRH