
We use our rotary cutters all day every day. Okay, that may not be entirely true but when we’re starting a new project and cutting pieces of fabric, we definitely use that tool a lot. I think it’s safe to say it’s the quilter’s favorite tool, you know, aside from our sewing machine!
With so much use, we wear down the blade pretty quickly and instead of having to buy a whole new rotary cutter every single time, did you know you can just swap out the blade? It could not be any easier, too! We teamed up with our friends at Pacific Fabrics and we think you’ll love their tip for marking the old blades so you can tell them apart!
Check it out below and don’t miss the written instructions below the video!
Changing your rotary blade (on a standard Olfa rotary cutter)
- Hold your rotary cutter by the handle in your non dominant hand (left for most of us) with the blade cover in place so the blade is not active. Place your index finger over the button that says 45mm and turn the cutter over so the bolt side is up.
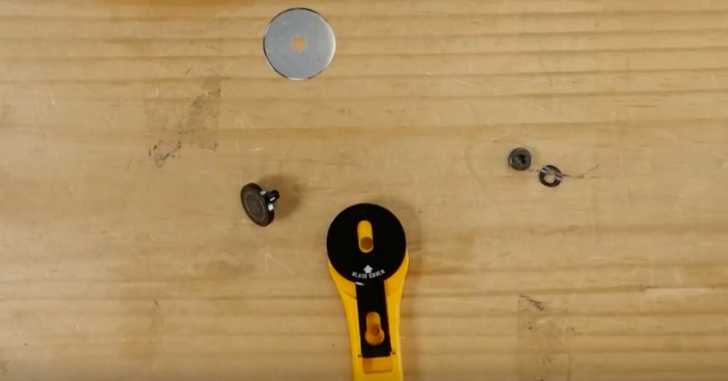
- Unscrew the bolt and the small curved disk and set aside.
- Turn the cutter back over and remove the button that says 45mm.
- Remove the disk blade, set aside and put a new one on. Replace the 45mm button, putting the post through the new blade and cutter, and put your index finger back onto the button to hold it in place while you turn the cutter over one more time.
- Put the curved disk back, curved side down, and screw the bolt back in. When you feel some resistance, stop tightening – a rotary blade that is too tight won’t spin, while one that is too loose may wobble.
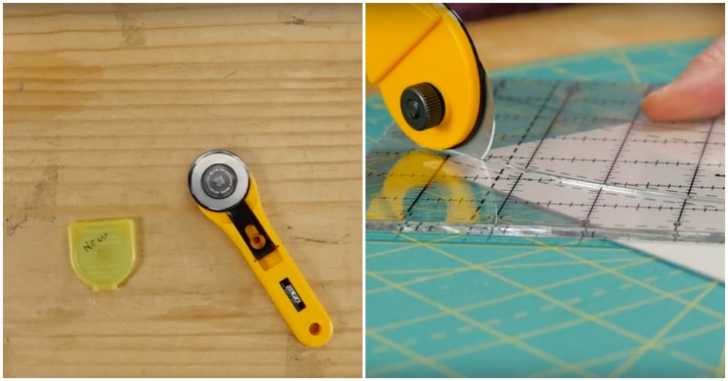
- Put your old rotary blade into the case your new one came in, and bring into Pacific Fabrics – we will recycle it for you! (if you are using a multi pack, put your old blades in the back – we recommend using a sharpie on the blade so you know it’s used.)
SKM: below-content placeholderWhizzco for CRH