Looking For An Easy Halloween Quilting Project? We’ve Got Just The Thing!
Follow along with this easy tutorial!

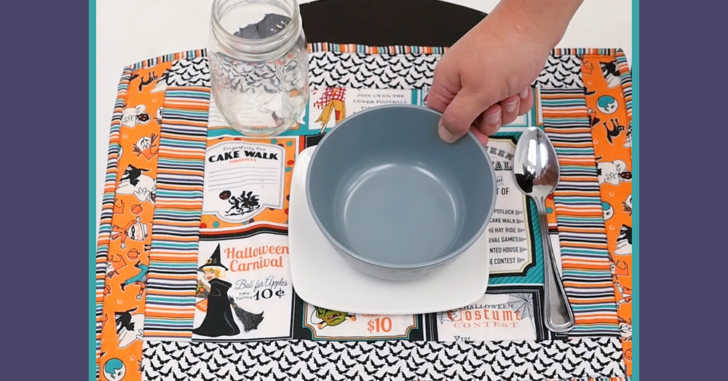
Aren’t these just the cutest placemats?! I love little quilting projects like these where you can complete each step, start to finish, in just under an hour. That’s right! That is the beauty of the quilt as you go method. Thanks to our friends over at Pacific Fabrics, we have this free pattern and video tutorial!
The secret to the quilt as you go method is using fusible fleece batting. Simply cut a yard of the fusible fleece batting and begin by ironing to the wrong side of the placemat backing. Then cut your pieces and iron them on the top, quilting each piece as you go (hence the name). Make sure to get the free pattern beneath the video, I know you’ll get the hang of this right away! Follow along with Chris from Pacific Fabrics as she quilts this adorable placemat for us!
Supplies:
– One fabric panel with six designs per panel (each design on the panel should measure approximately 12″ x 14″) or one yard of fabric with large novelty or floral print
– 1-yard coordinating fabric for backing
– 1/2-yard each of three coordinating fabrics for borders and binding
– 1-yard Fusible Fleece Batting
Cutting Directions:
1. Trim the center design to 10 x 12 inches.
2. Border 1: Cut two pieces of coordinating fabric 2 x 10 inches.
3. Border 2: Cut two pieces of coordinating fabric 2 x 15 inches.
4. Border 3: Cut two pieces of coordinating fabric 2 x 13 inches.
5 Cut backing and batting pieces 13 x 18 inches.
Sewing & Fusing Directions:
1. Iron the fusible fleece batting to the wrong side of the placemat backing with the batting side up.
2. Center the fabric panel, right side facing up, on top of the batting, approximately 1 3/4 inches from edges on top and bottom and 3 inches on each side.
3. Place one piece of border #1 to the left side of the panel, lining up the raw edges, right sides together.
4. Stitch 1/4 inch from the raw edge, flip open and press in place. Repeat for the right side of the placemat.
5. Place one piece of border #2, right sides together, across the top of the placemat.
6. Stitch 1/4 inch from the raw edge, flip open as before and press. Repeat on the bottom of the placemat.
7. Place one piece of border #3, right sides together, on top of the first border on the left, line up the raw edges.
8. Stitch 1/4 inch from the raw edge, flip open and press. Repeat with the second piece of border #3 on the lower edge of the placemat.
9. Finish placemat with your choice of binding methods and enjoy!
SKM: below-content placeholderWhizzco for CRH