Quick And Easy Cat Ear Beanie
This has become one of my favorite one skein projects that can easily be completed in one sitting.

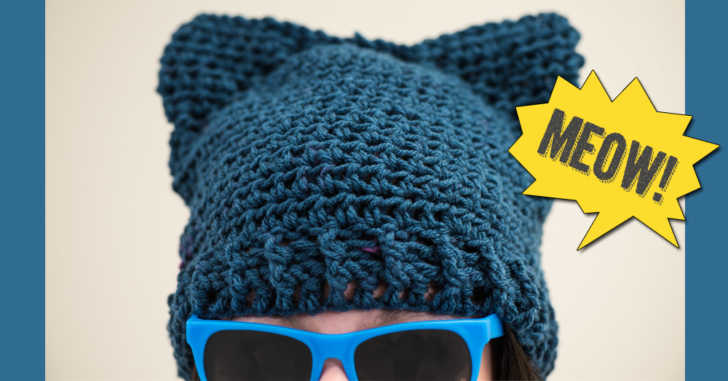
What’s not to love about this adorable beanie?! This has become one of my favorite one skein projects that can easily be completed in one sitting. I love everything about this hat, from the detailed rim that looks like knitting, to the thick stitches making this hat super warm and cozy for those chilly days ahead. Of course, the crowning feature of this adorable hat is the cat ears! It’s super simple to achieve this look, just close up the hat with a row of slip stitches, forming a square, and simply sew up the corners! Watch our technique in the video below, and scroll down for the free pattern. Happy cat ear crocheting, friends!
Cat Ear Beanie Pattern
Row 1: chain 55, join with a slip stitch to form a circle. Turn.
Row 2: chain 3, double crochet in each stitch around. Join with a slip stitch. Turn.
Rows 3 & 4: chain 3, front post double crochet in first stitch, back post double crochet in next stitch. Repeat alternating front and back post double crochet around. Join with a slip stitch. Turn.
Rows 5-16: chain 2, half double crochet each stitch around. Join with a slip stitch. Turn.
Once finished with row 16, cut the yarn leaving a long tail. Turn hat inside out. Close up the hat by slip stitching across.
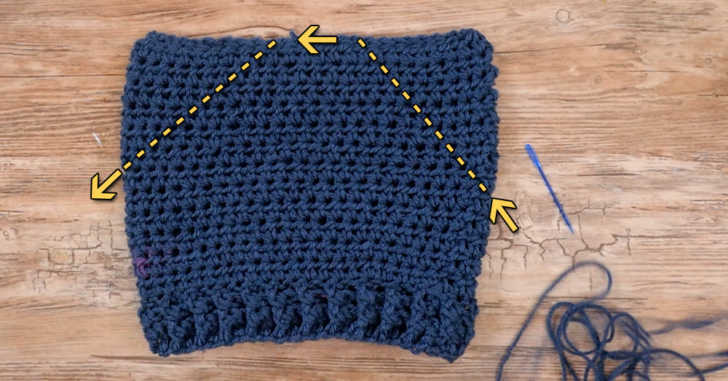
Thread a yarn needle and stitch the top corners of the hat to form ears. Pull on the thread to tighten everything up. Tie a knot to secure and weave in the ends.
SKM: below-content placeholderWhizzco for CRH