
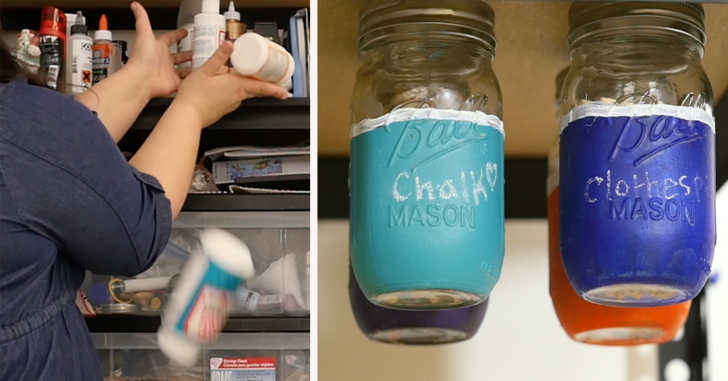
If your craft shelves look anything like mine, it can be hard to find anything! You know you have that glue somewhere… And before you know it, things are falling off the shelf and you’re at the end of your rope. Good thing it’s about time for some spring cleaning! We were way overdue for some reorganization around the Crafty House studio, and we’re here to share with you one of our favorite ways to reorganize and bring new life to old, cluttered shelves!
Mason jars are perfect for storing crayons, chalk, buttons, beads, and just about anything else you can think of. While a quick coat of paint can spruce up any jar, we decided to take things a step further and utilize the space at the top of the shelves that never gets used. That’s prime real estate up there! Once we attached the magnets and hung up the jars, there was still plenty of space to stack paper, magazines, etc. Now that’s a creative use of space! See what we did in the video below, and follow along with the full instructions beneath the video. Here’s to a better organizes craft room!
Supplies:
– Mason Jars
– Strong magnets
– Glue
– Chalk paint
– Craft paint
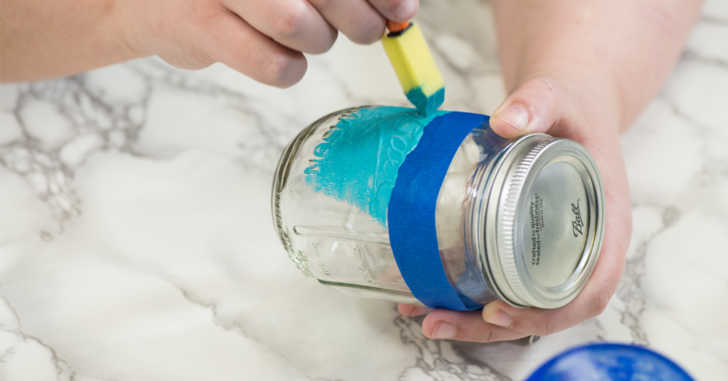
– Painter’s tape
Directions:
1. Paint a wide strip of chalk paint around the middle of the mason jar. Let dry.
2. While drying, glue magnets onto shelf. (Or, if the surface you’re sticking the jars to is metal, glue the magnets on the inside of the mason jar lid).
3. Fill mason jars with craft supplies, and label with chalk.
4. Stick jars on magnets, and enjoy your organized space!
SKM: below-content placeholderWhizzco for CRH