
Looking for a fresh take on the traditional quilt patterns? Try making a rag quilt — which is not only trendy, but also pretty easy to construct. Unlike typical projects, rag quilts actually display the seam allowances on the front — which creates very defined, distinct squares throughout the quilt.
With the right fabric and the right tips — like the ones we’ve included below — you’ll be crafting one in no time!
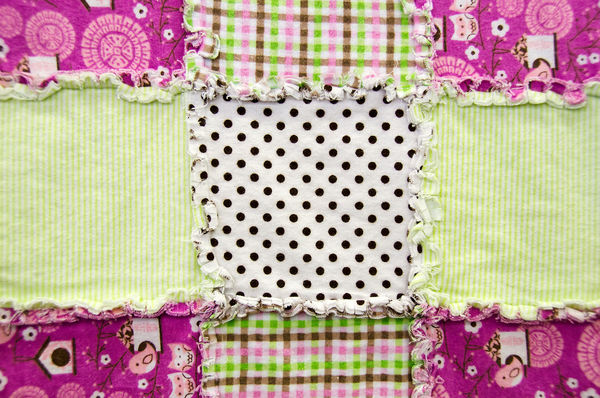
- Pick your fabricsAs About explains, some fabrics are just better for rag quilts than others. Cottons, flannels, and denims fray nicely — an important part of the rag quilt look — while polyesters often don’t. The number of different fabrics that you use is up to you — some people keep it to three different fabrics, while others will use dozens.
- Decide how big you want your quilt — and how many squares you’ll needThe Desig{nest} has a helpful chart for figuring this out, offering measurements for how many rows and columns of squares you’ll need based on the size of the square (4, 5, 6, or 7 inches) and the size of the quilt itself (from baby to king bed). Then, you can also map out how much fabric you’ll need.
- Map out a rough idea of the quilt and where fabrics will goThis is as simple as creating a big grid on a piece of paper, and creating a key that speaks to each fabric you’re using — then, mark each square with a symbol or color that designates what fabric will go there. It’s nice to create a blueprint ahead of time so you get the design you want.
- Make quilt sandwiches with your fabric, batting, and back fabricMake quilt sandwiches that consist of your front-facing fabric, the batting of your choice, and the back fabric. Pin the fabrics together and then sew in an X across each sandwich to keep it in place (or whatever design you like — it’s just meant to keep the squares together). Keep in mind that these squares will need a seam allowance, so don’t sew the X right to the edges/corners. Also make sure batting isn’t sticking out at all — you’ll want batting squares to measure smaller than the fabric squares.
- Start sewing squares and rows togetherLay out the sandwiches how you want them to appear and start sewing them together, row by row, wrong sides together,making sure to leave a visible seam allowance of 1/2 to 5/8 inch sticking out (seems weird, but that’s the fun of the quilt!). Don’t forget to sew the outer edges of the quilt as well, also with the seam allowance.
- Fray the seamsThe Complete Guide to Imperfect Homemaking suggests sitting down with a pair of scissors (and a good movie) and carefully snipping into the seam allowances — avoiding actually cutting any stitches — so it looks like a lot of shredded fabric popping up from the quilt. Making 1/4-inch cuts straight down into the seam allowances usually works well, so it isn’t too close to the seam.
Then, throw the quilt in the washing machine to encourage even more fraying. About says that a little soap and softener help the process. Once dry, give the quilt a nice shake so all the little pieces of thread fall off the quilt.
- Inspect the final productDo any of the seams look like they didn’t get frayed? Grab your scissors and start snipping!
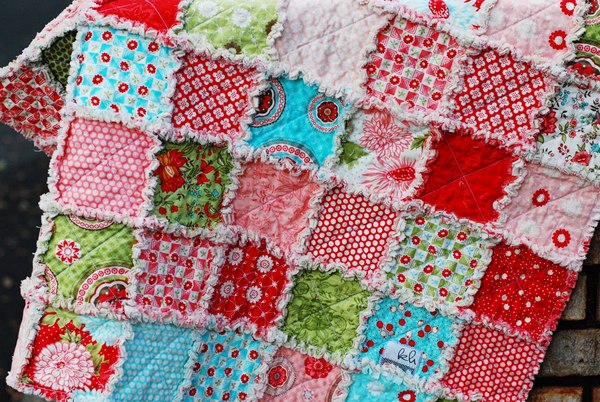
And, voila! You’ve got a beautiful rag quilt that’s perfect for a gift or staying cozy when it’s chilly outside.
SKM: below-content placeholderWhizzco for CRH