She Chains 21, And A Few Steps Later Has These Trendy Winter Accessories!
I can’t wait to make more of these!


How cute are these fingerless gloves? I just love this trendy accessory, perfect for those fall and winter mornings on the way to work or just running errands. I used a super soft wool for this project with a gradient color change. I really like how it turned out! I think the different colors make this project fun and unique.
Of course, you can use any kind of yarn you want, just make sure to adjust the gauge. Ultimately, to make this pattern work, you’ll need a multiple of 3. So if you change the weight of the yarn, just make sure to double check your size by wrapping the chain around the middle of your hand. If it fits, go with it!
The hardest part to understand about this pattern is the faux spaces to create the thumb hole. Basically, you’ll work 6 rounds of single crochets, and then work cluster stitches (3 double crochets in the same stitch) for 4 rows to form a thumb hole. Then, back to working in the round.
In order to work the cluster stitch in a row instead of a round, you’ll need to create “faux spaces” at the end of the rows to work your next cluster stitch in. It may seem complicated, but just follow along in the video below, and get the free pattern beneath the video!
Supplies:
– Worsted weight yarn
– 4.5 mm hook
Directions:
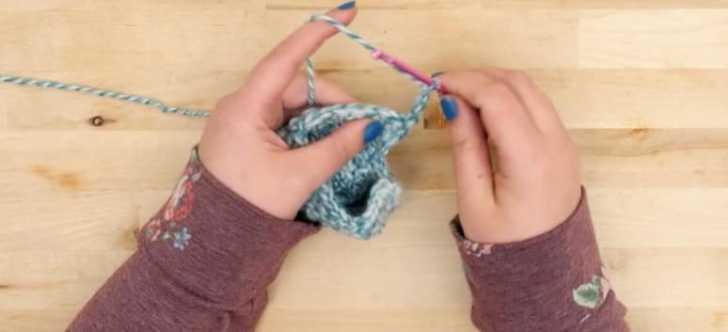
1. Chain 21. Sl St to join.
2. Rounds 2-6: chain 1, sc around, sl st to join.
3. Row 7: Ch 2, dc 2 into base of chain. *Skip 2 sts, dc 3 together into next st. Repeat from * for a total of 6 clusters. Chain 2 and turn. (You’ll be working in rows to form a thumb hole)
4. Row 8: dc 2 into base of ch, then dc 3 together into each of the spaces between your clusters. At the end of the row, ch 4 (this creates a “loop” that you’ll use as a space in the next row). Turn.
5. Row 9: Begin dc 3 together in the first space of your previous row. Continue dc 3 together in each space around. At the end of the row, ch 2, and dc into the last stitch of the previous row. (This creates another faux space). Turn.

6. Row 10: ch 2, dc 2 together in the “faux space” you just created in the previous row. Continue dc 3 together in each space around. At the end of the row, dc 3 together into the original “faux space” created by the ch 4.
7. Row 11: Dc 2 into the base of your chain, then dc 3 together in each of the spaces as before. At the end of the row, ch 3 and continue crocheting clusters of 3 on the other side of the gap. (This closes the thumb hole, and you’ll be crocheting in the round from now on). After your last cluster of 3, dc 2 into the base of your original chain 3. Sl St to join.
8. Round 12-14: ch 2, dc 2 into base of ch, dc 3 together in the spaces between clusters (you should have 8 clusters.) Sl st to join.
9. Rounds 15-16: ch 1, single crochet around.
10. Fasten off and weave in ends.
11. Thumb: Round 1: Join yarn, sc around thumb hole, sl st to join.
12. Round 2: ch 1, sc 2 together, sc next 6 sts, sc 2 together. Repeat around. Sl st to join.
13. Round 3: ch 1, sc 2 together, sc next 4 sts, sc 2 together. Repeat around. Sl st to join.
14. Round 4: ch 1, sc 2 together, sc next 3 sts, sc 2 together. Repeat around. Sl st to join.
15. Round 5: ch 1, sc 2 together, sc next st, sc 2 together. Repeat around. Sl st to join. Weave in ends.
SKM: below-content placeholderWhizzco for CRH