She Weaves Yarn In Between Her Fingers And Makes Magic Scarves!
Have you ever seen this technique before! Gorgeous!

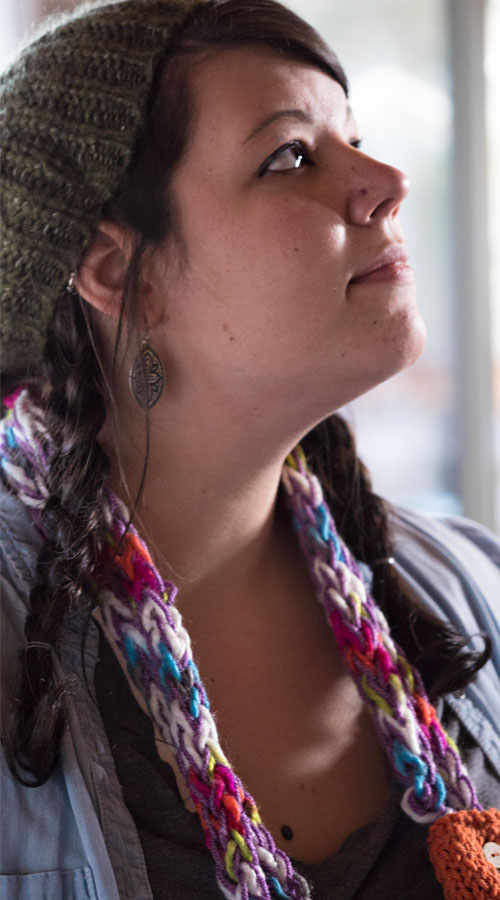
I love these scarves! So chic and trendy, and perfectly customizable. Use thicker yarn (or double up on regular yarn) for a chunkier scarf, or use one strand of thinner yarn for an open and airy look, perfect for summertime! Have you ever seen the finger knitting technique before? I always thought it was for little kids, but this project proves that finger knitting makes for some awesome grow up scarves too. Speaking of the kiddos, they would probably love to make their own scarf. What a fun project for both of you to do together on a rainy day! Follow along with us in the video below, and scroll down for the written instructions. Happy knitting, friends!
If you like finger knitting, you’ll love our tutorial on finger crocheting.
Supplies:
– Yarn (one color for a more open/light scarf, two colors for a tighter, heavier design)
– Buttons
– Needle & thread
Directions:
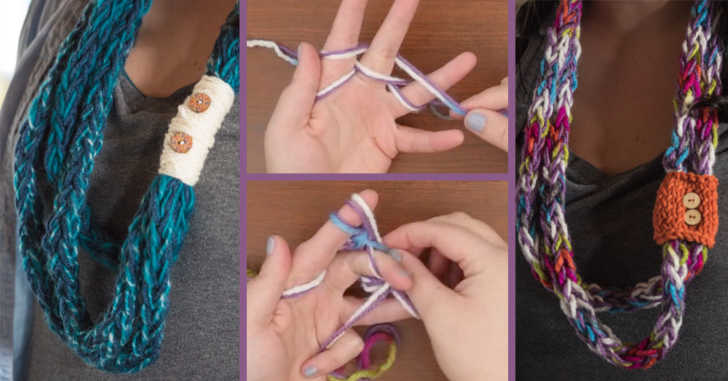
1. Foundation row: Hold the end of the yarn between the thumb and side of the hand. Wrap the working yarn behind the first finger, in front of the middle finger, and behind the ring finger. Bring the working yarn to the front of the ring finger, behind the middle finger, and in front of the first finger. Repeat. You should now have 2 rows on all fingers.
2. Starting with the ring finger, take the bottom loop, and pass over the top loop and off the finger. Repeat on middle finger and first finger.
3. Row 2: Weave another row of working yarn between fingers. Pass the bottom layer of loops over the top layer and off of fingers, starting with the ring finger, working towards the first finger.
4. Repeat row 2 until you reach your desired length of scarf.
5. Cut string, and tie ends together.
6. Loop scarf, and wrap with accent yarn or fabric. (Optional: You can also knit a small rectangle, wrap around the scarf, and secure with a large button.)
7. Sew on buttons.
8. Wear and look fab.
SKM: below-content placeholderWhizzco for CRH